
Ever looked at that broken item in your home and thought about tossing it? Hold that thought! Many household items can be fixed with simple tools and a bit of know-how, saving you money and reducing waste.
Before you head to the store for replacements, check out these common household items you can repair yourself in just a few steps.
1. Scratched hardwood floors
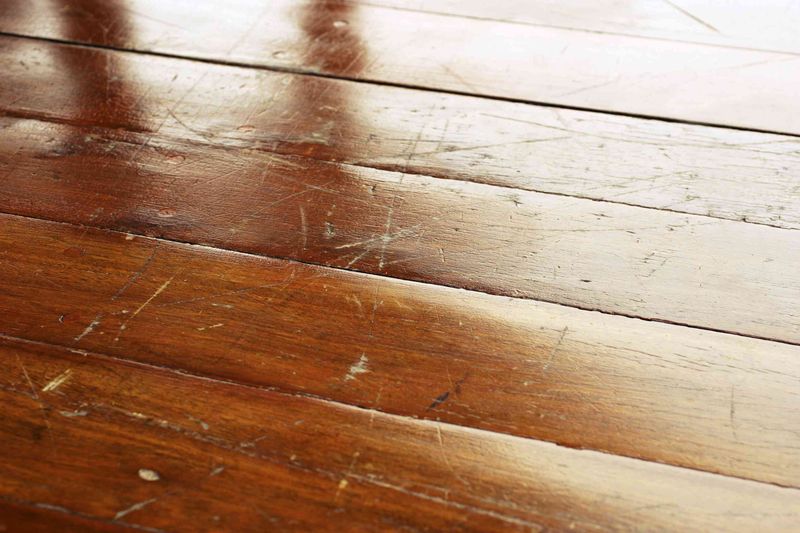
Got unsightly scratches marring your beautiful floors? Mix equal parts olive oil and vinegar, then rub the solution into the scratch with a soft cloth.
For deeper gouges, try using a crayon that matches your floor color to fill in the gap. Heat it slightly with a hair dryer, then buff with a soft cloth.
Your floors will look refreshed without the hefty refinishing cost!
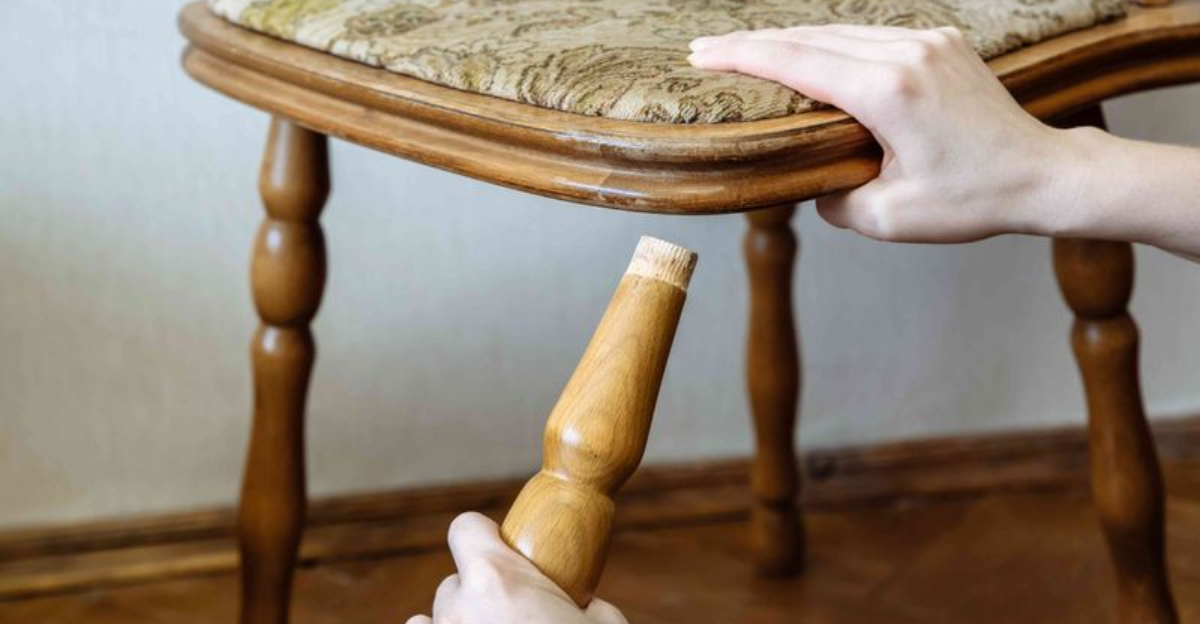
2. Wobbly chair legs
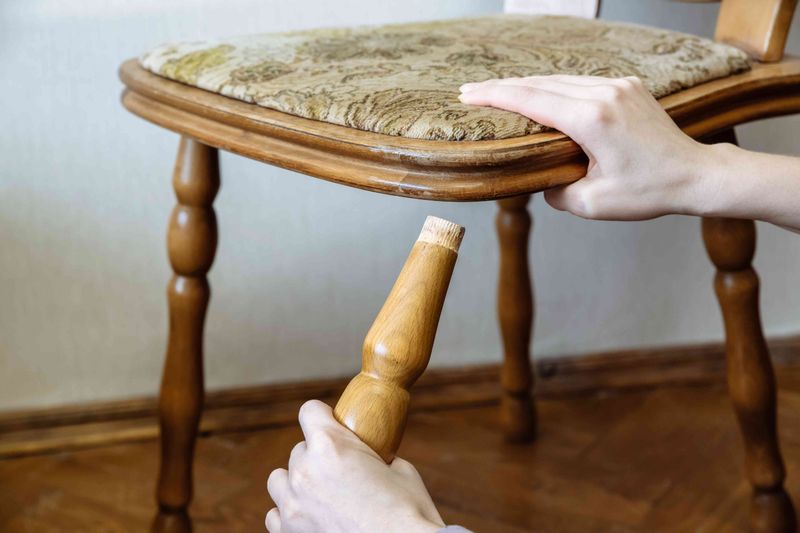
Mealtime shouldn’t feel like riding a seesaw! Turn the chair upside down and identify which leg is causing the wobble.
Tighten any visible screws with a screwdriver, or add wood glue to loose joints and clamp until dry.
For uneven legs, glue a small furniture felt pad to the bottom of the shorter leg to create instant stability without purchasing new furniture.
3. Leaky kitchen faucet
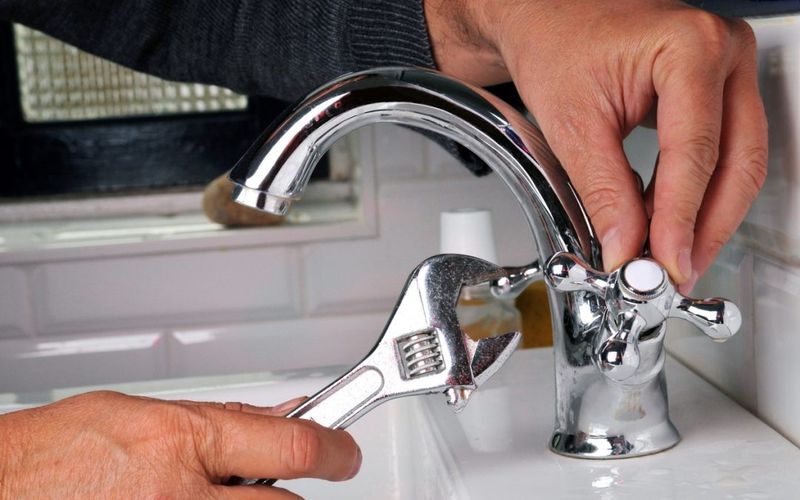
That annoying drip is wasting water and money! First, shut off the water supply valves under the sink and plug the drain to prevent losing small parts.
Disassemble the faucet handle and locate the worn washer or O-ring that’s causing the leak.
Replace this inexpensive part (bring the old one to the hardware store for exact matching), reassemble, and enjoy the sweet sound of silence.
4. Cracked tile grout
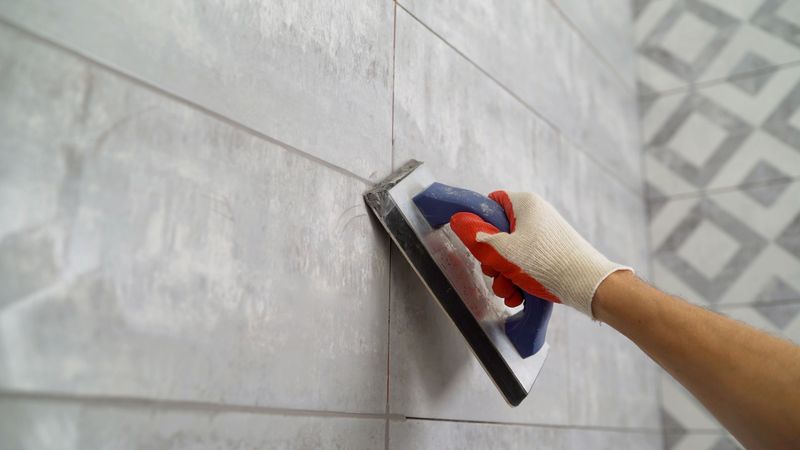
Wondering why your bathroom always feels damp? Cracked grout might be the culprit! Remove the damaged grout with a grout removal tool or oscillating multi-tool with a grout attachment.
Vacuum away all debris, then apply new grout with a rubber float, working at a 45-degree angle.
Wipe away excess with a damp sponge after 15 minutes, and your tile will look brand new while preventing water damage.
5. Squeaky door hinges
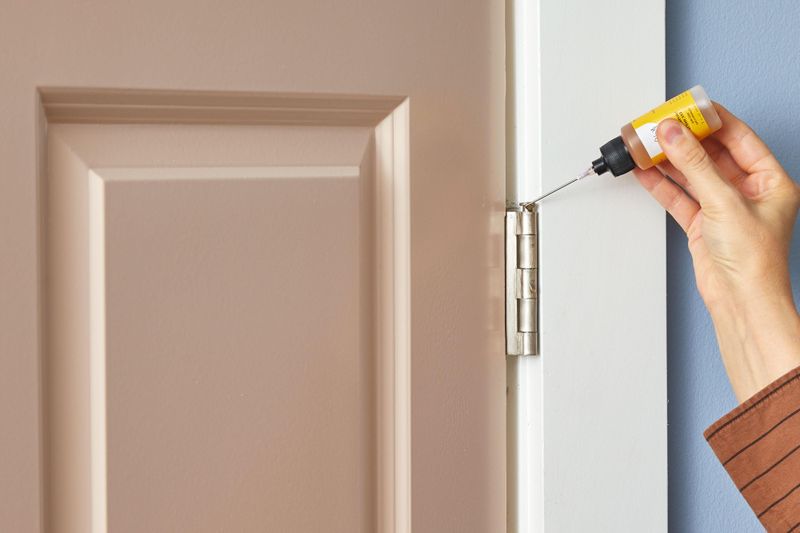
Nothing announces your midnight snack run like a screeching door! Remove the hinge pins by tapping them upward with a hammer and nail.
Clean the pins with steel wool to remove built-up grime, then apply a small amount of petroleum jelly or silicone-based lubricant.
Reinsert the pins and swing the door a few times to distribute the lubricant, enjoying your new stealth mode access.
6. Peeling wallpaper corners
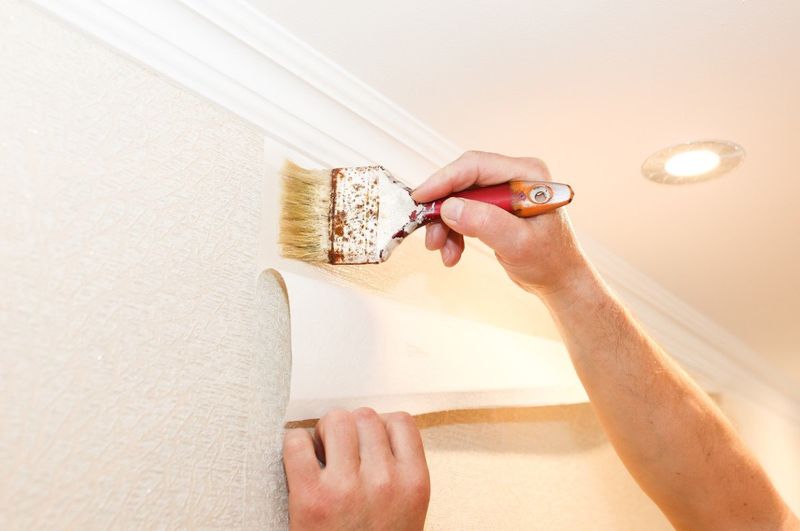
Those curling edges make your walls look shabby. Carefully lift the loose section and apply wallpaper adhesive with a small brush to both the wall and paper backing.
Press the paper back in place with a clean cloth, working from the center outward to remove air bubbles.
Wipe away excess glue with a damp sponge and place a heavy book against the corner while it dries for a seamless finish.
7. Chipped cabinet paint
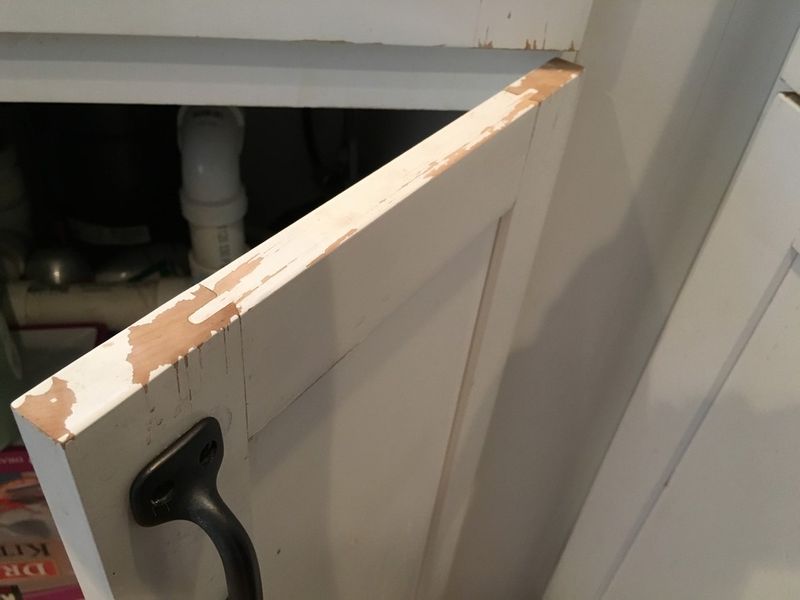
Kitchen cabinets take a beating. For a quick fix, clean the chipped area with a degreaser and lightly sand the edges of the chip.
Use a small artist’s brush to apply matching paint to the bare spot, building up thin layers rather than one thick coat.
Once dry, apply a tiny amount of clear polyurethane sealer with a cotton swab to protect your repair and blend it with the surrounding finish.
8. Running toilet
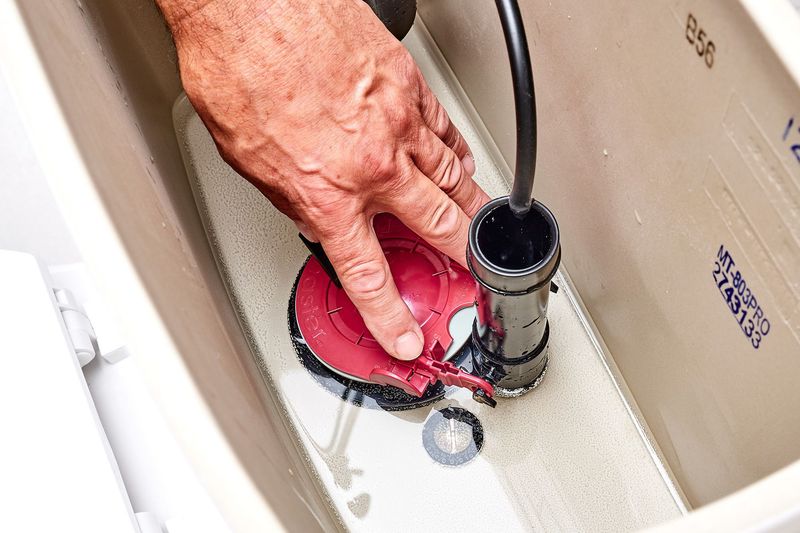
A toilet that won’t stop running wastes gallons of water daily? Remove the tank lid and observe what’s happening inside.
Usually, the flapper isn’t seating properly or the fill valve needs adjustment. Replace the flapper (about $5) by unhooking it from the chain and pegs.
If the water level is too high, adjust the float arm or cup to sit lower in the tank, stopping the water about an inch below the overflow tube.
9. Loose doorknobs
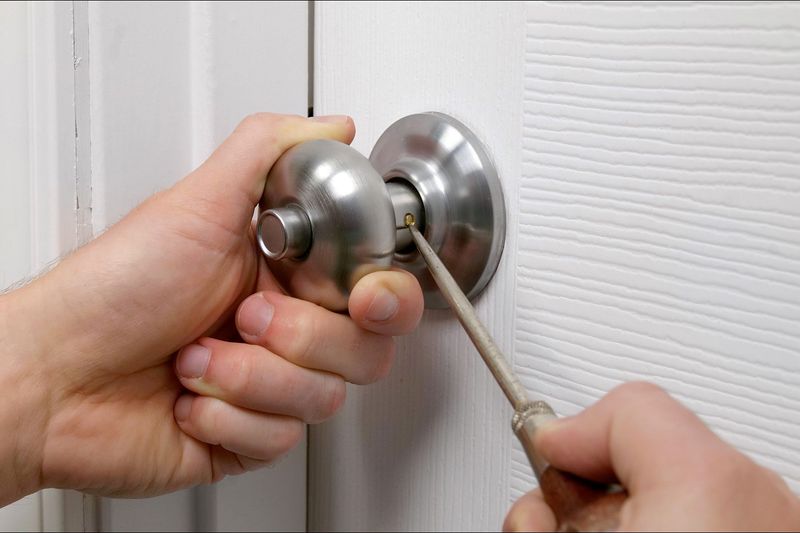
Feeling like your doorknob might come off in your hand? Look for a small slot on the neck of the knob – that’s where the secret lies!
Insert a flathead screwdriver into this slot and push the spring clip while pulling the knob off.
Tighten the screws on the mounting plate, then reattach the knob by aligning it with the spindle and pushing until the spring clip engages with a satisfying click.
10. Small drywall holes
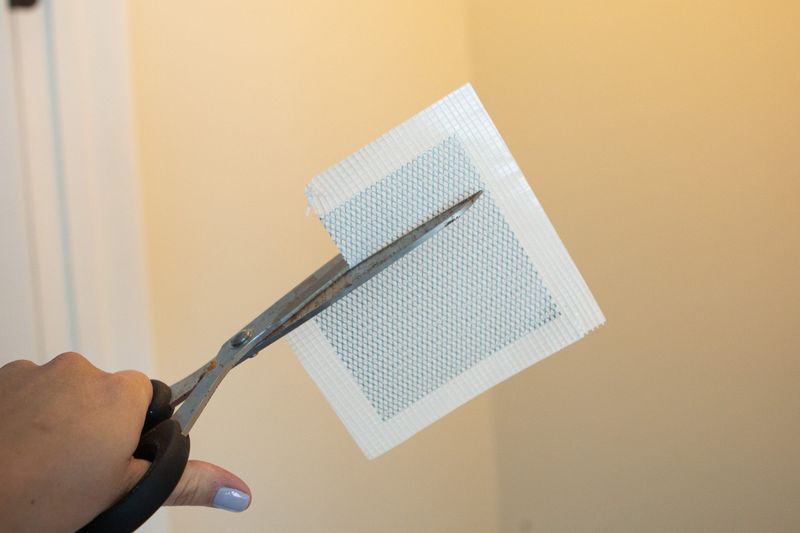
If you have accidentally punched a hole in your wall, you shouldn’t fear the repairs. For holes smaller than 4 inches, grab a drywall patch kit from your local hardware store.
Clean the hole area, apply the self-adhesive mesh patch, and spread a thin layer of spackling compound over it with a putty knife.
Let it dry completely, sand until smooth, and paint to match your wall – visitors will never know your secret!
11. Sticking window tracks
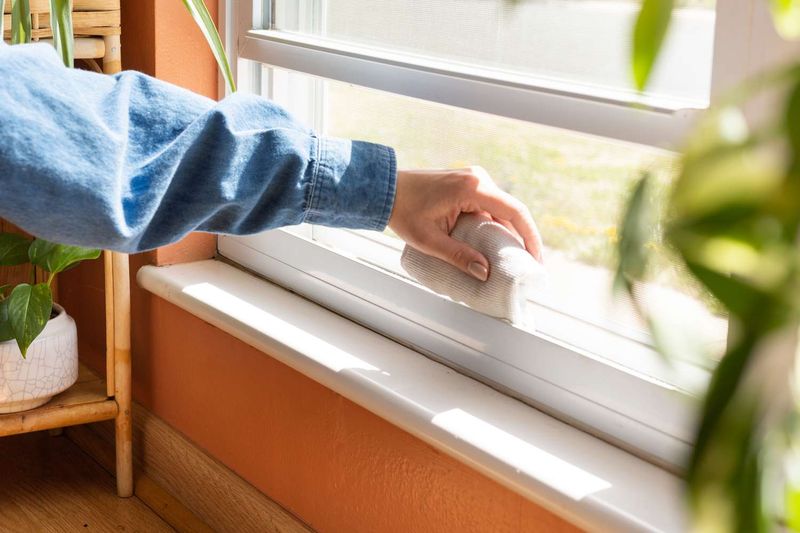
Struggling with windows that won’t budge often means built-up dirt and grime in the tracks is to blame.
Spray the tracks with white vinegar and let it sit for 5 minutes to dissolve stubborn residue.
Scrub with an old toothbrush, vacuum out debris, then spray silicone lubricant along the tracks. Open and close the window several times to distribute the lubricant for smooth operation.
12. Worn caulk in the bathroom
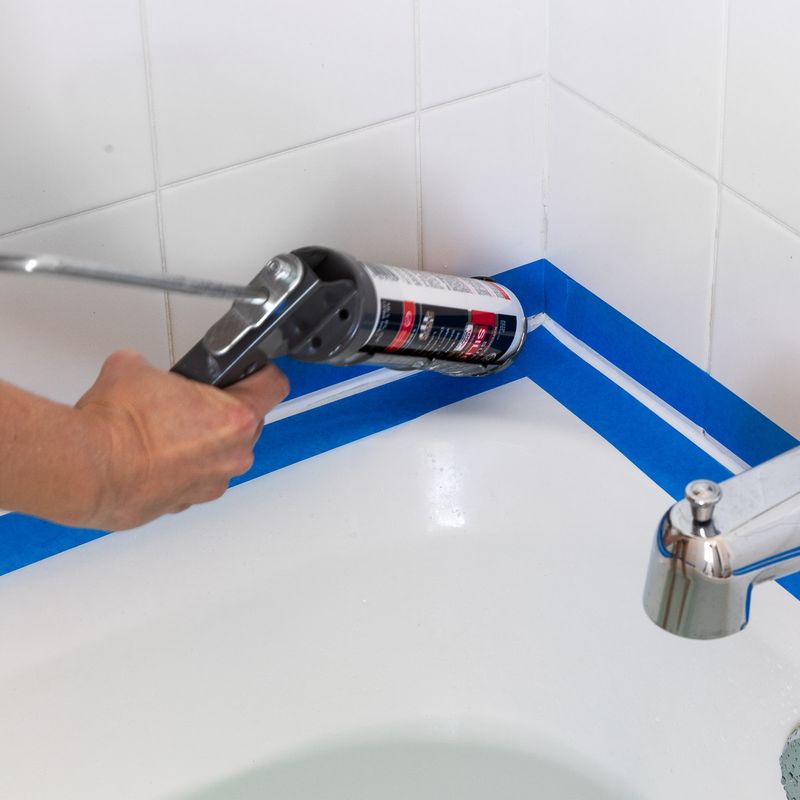
Moldy, cracking caulk isn’t just unsightly – it allows water to seep behind fixtures! Cut away old caulk using a utility knife or caulk removal tool.
Clean the area thoroughly with rubbing alcohol and let it dry completely.
Apply new silicone caulk in a continuous bead, then smooth it immediately with a wet finger or caulk smoothing tool for a professional-looking waterproof seal.
13. Sagging drawer bottoms

Reaching into a drawer shouldn’t feel like your items might fall through. Remove the drawer and empty its contents.
Flip it over and measure the bottom panel. Cut a piece of 1/4-inch plywood to those dimensions and attach it underneath the existing bottom with wood glue and small nails.
This reinforcement provides additional support without requiring a complete drawer replacement, saving you significant money.
14. Flickering light fixtures
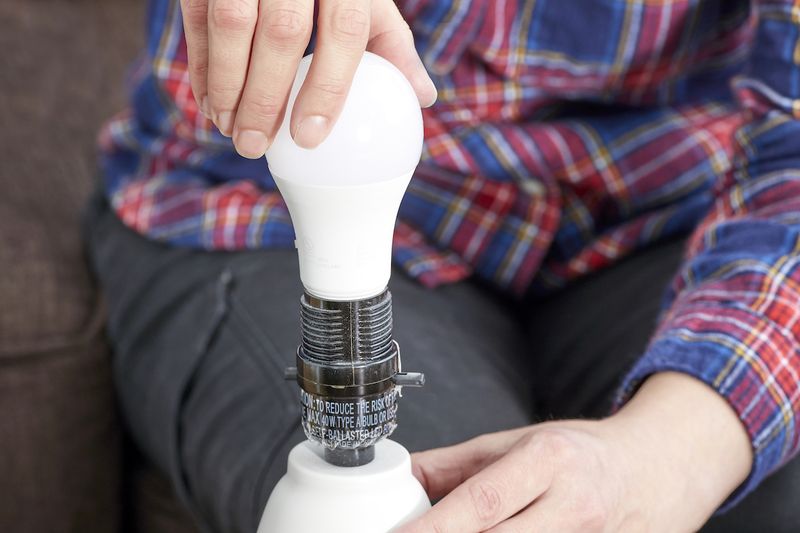
Living in what feels like a haunted house? Before calling an electrician, try some simple fixes! Turn off the power at the breaker box first for safety.
Check if the bulb is loose by tightening it slightly. If that doesn’t work, inspect the socket for corrosion and clean with fine sandpaper.
Still flickering? The issue might be a loose wire connection – tighten the wire nuts inside the fixture base.
15. Torn window screens
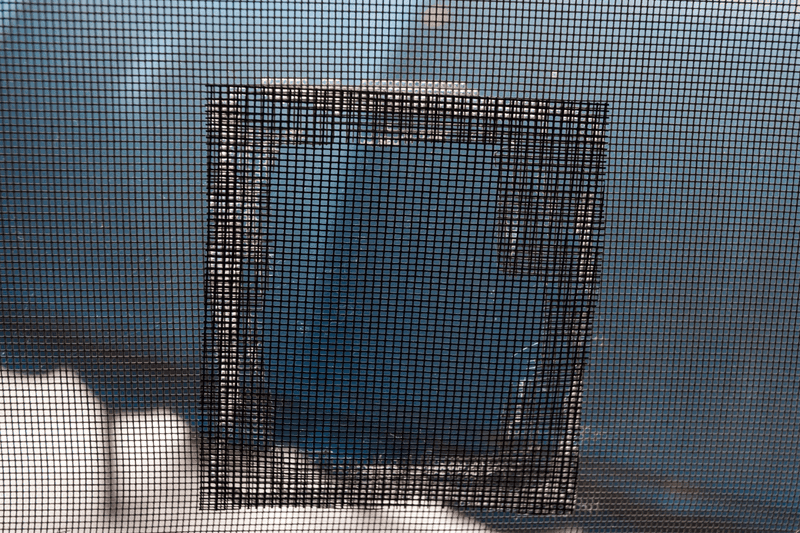
Small tears in window screens invite unwanted insects. Tiny holes can be treated with clear nail polish to stop the tear from spreading.
For larger holes, cut a patch from new screen material about one inch larger than the damaged area. Unravel a few strands from the patch edges, then press these wire “fingers” through the existing screen.
Bend them flat against the back side for an almost invisible repair that keeps bugs outside where they belong.
16. Unstable stair railings
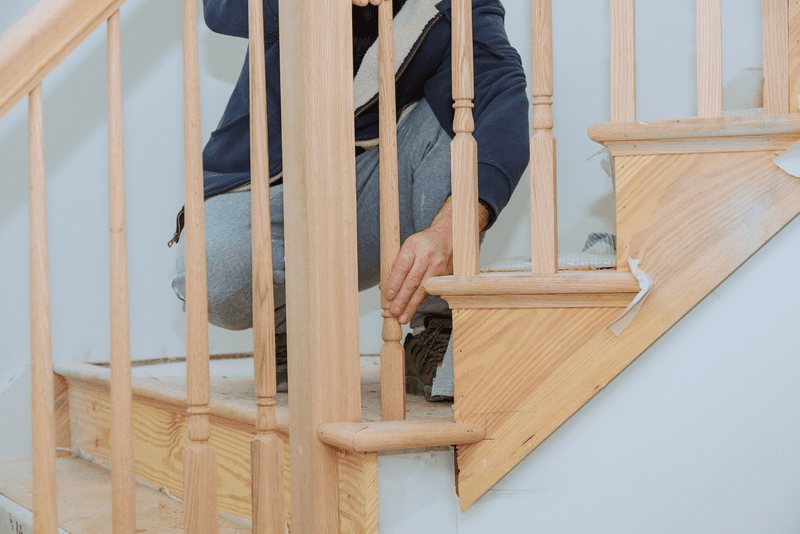
A wobbly handrail is a serious safety hazard. Locate where the railing attaches to the wall and tighten any visible screws with a screwdriver.
If the screws spin freely, they’ve likely pulled out from the wall. Remove them and install longer screws that reach the wall studs, not just the drywall.
For wooden railings, reinforce loose balusters by applying wood glue to the joints and clamping until dry.
17. Water-stained ceiling patches
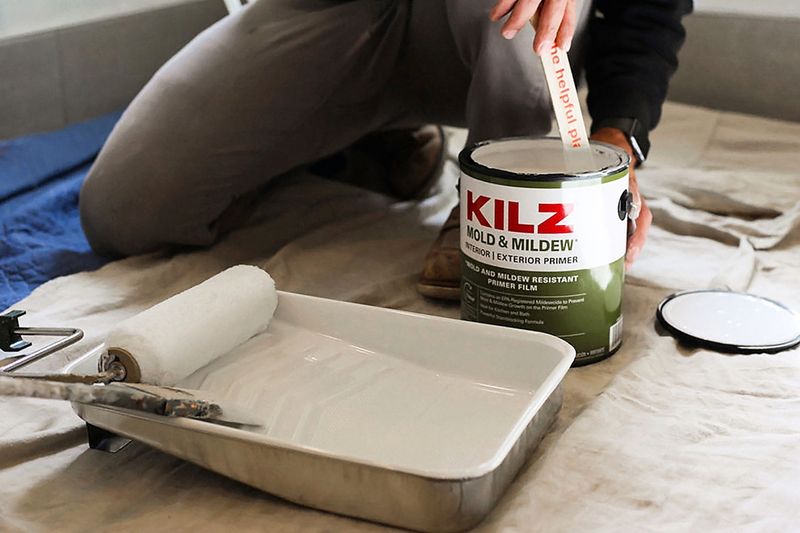
Those yellowish-brown circles on your ceiling tell a story of past leaks. First, ensure the water source is fixed. Let the ceiling dry completely, then apply an oil-based stain-blocking primer to prevent the stain from bleeding through.
Once dry, apply ceiling paint with a roller, feathering the edges for a seamless blend.
For textured ceilings, use a spray texture to match the pattern before painting for an invisible repair.