
Designing a narrow bathroom can feel like a puzzle – but with the right layout, even the slimmest space can be stylish and efficient.
It’s all about smart placement, space-saving features, and choosing elements that enhance flow without crowding the room. Designers have mastered the art of making compact bathrooms feel larger, brighter, and far more functional than you’d expect.
Planning a full remodel or simply hoping to improve your current setup? These layouts deliver smart, creative ways to make the most of a narrow bathroom. Discover 20 top design ideas that turn tight spaces into beautifully efficient retreats.
1. Corner Shower Strategy
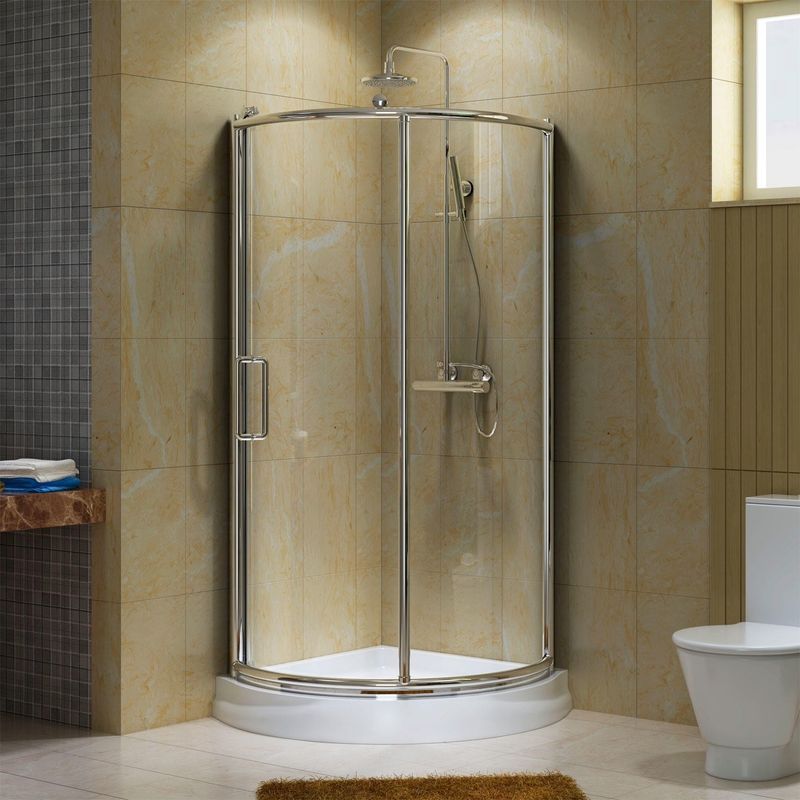
Tucking a shower into the corner frees up precious floor space while creating a focal point. By using clear glass doors instead of curtains, you’ll maintain visual openness throughout the room.
Many homeowners find that triangular or quarter-circle shower bases fit perfectly in corners without jutting too far into walkways. Add recessed shelving inside the shower wall to keep toiletries organized without sacrificing elbow room.
2. Wall-Mounted Everything
Floating fixtures create the illusion of more floor space, making your bathroom feel instantly larger. When toilets, vanities, and even storage units hover above the ground, cleaning becomes easier too!
Select slim-profile options that extend just 14-16 inches from the wall rather than standard 21-inch depths. The visual lightness of wall-mounted pieces transforms a cramped corridor into a sleek, contemporary haven where light bounces freely beneath fixtures.
3. Pocket Door Installation
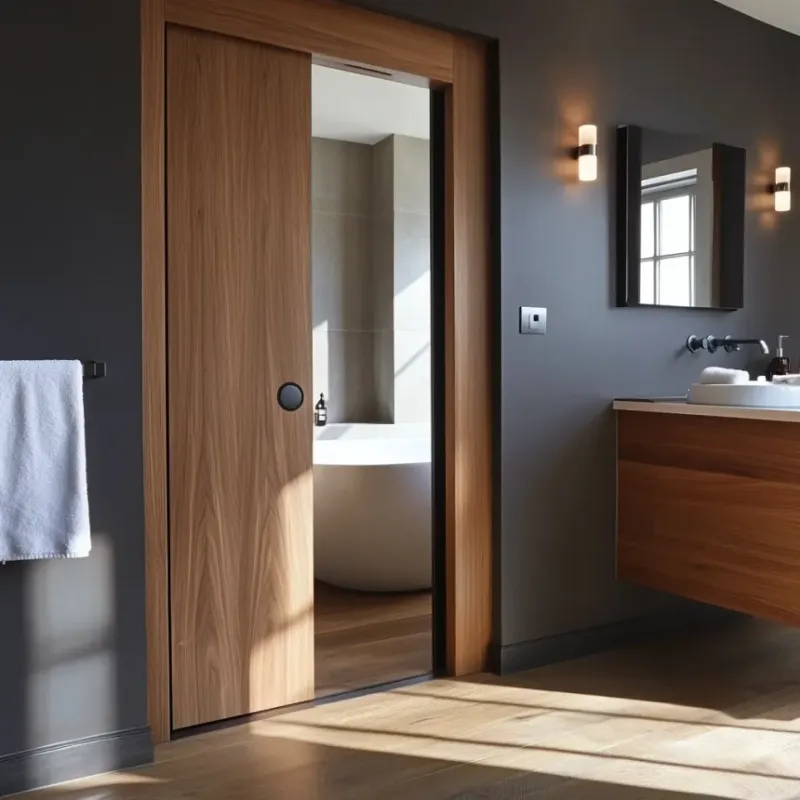
Why sacrifice valuable space to a swinging door? Pocket doors slide neatly into the wall when open, reclaiming about 10 square feet of usable area.
For master bath setups, consider installing double pocket doors that create a grand entrance while maximizing functionality. The hardware has improved dramatically in recent years, offering smooth, quiet operation that won’t wake your partner during nighttime bathroom visits.
4. Pedestal Sink Placement

Nothing beats a pedestal sink for visual lightness in tight quarters. These elegant fixtures draw the eye upward while keeping the floor plan open and airy. Choose a rectangular model rather than oval to maximize counter space without adding width.
Some newer designs include small ledges for hand soap or a toothbrush holder. Complement with a mirrored medicine cabinet above to handle storage needs without consuming floor space.
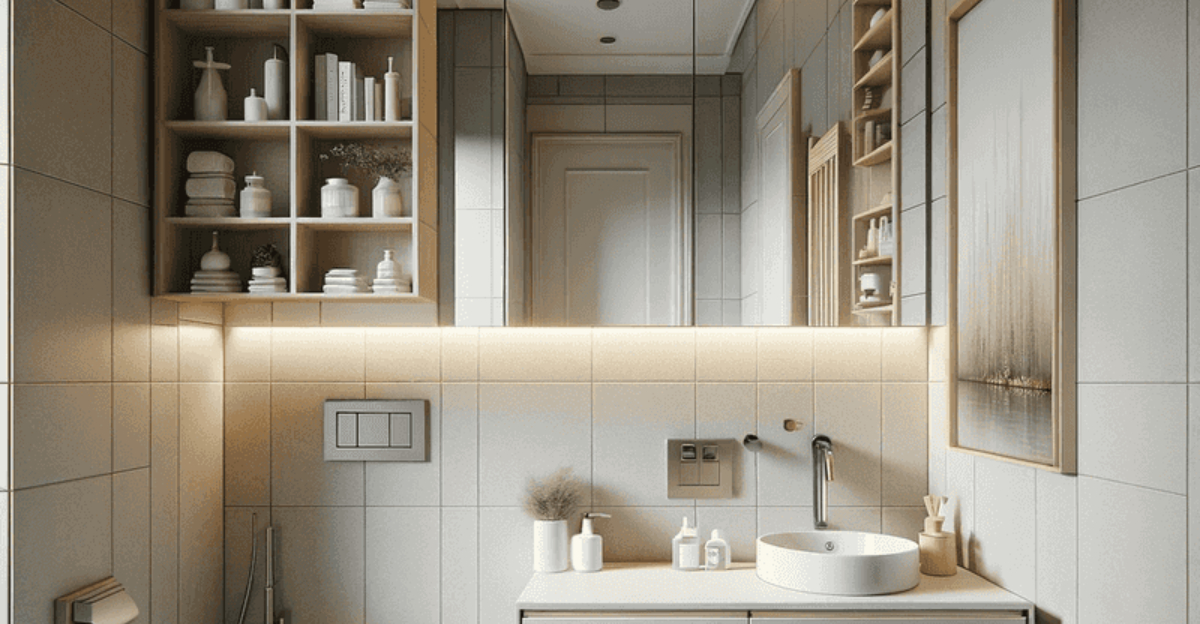
5. Extended Counter Over Toilet
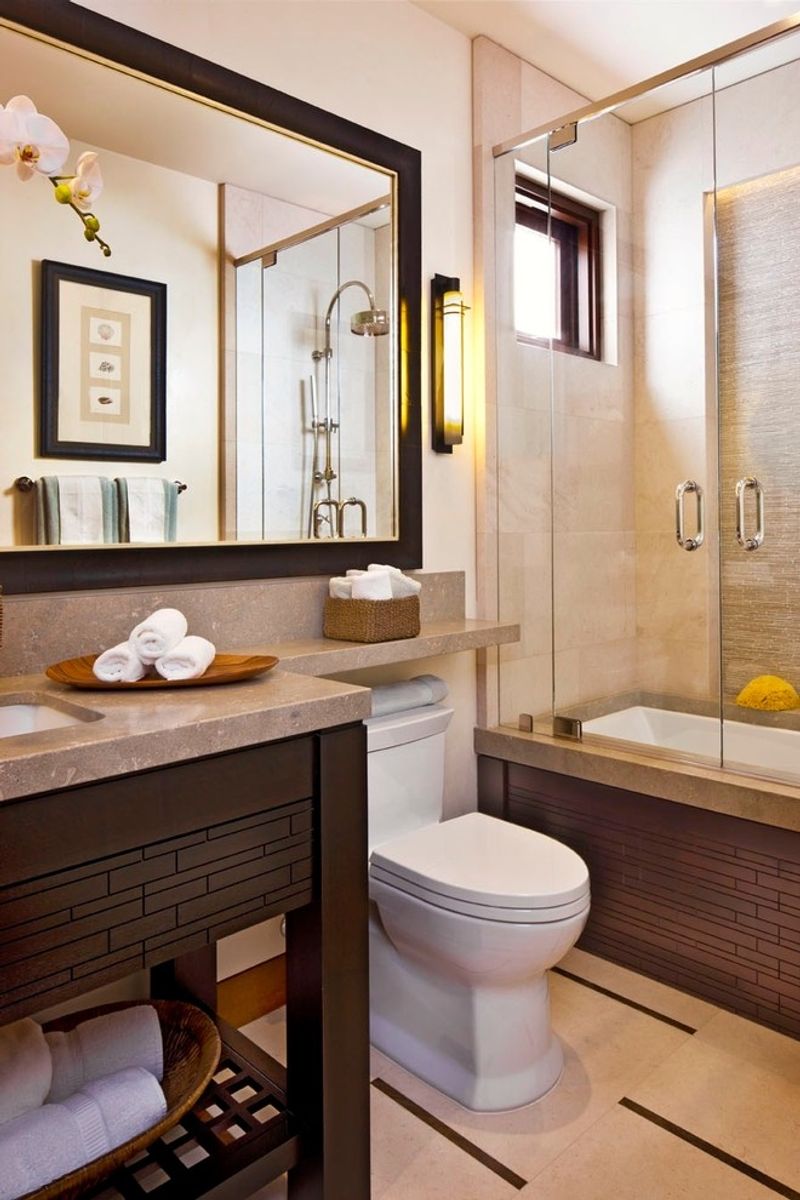
Make every inch count by extending your vanity counter directly over the toilet tank. This clever trick creates additional surface area without widening the footprint. You’ll gain valuable space for decorative items or everyday essentials without feeling cramped.
The key is using a slim-profile toilet and ensuring at least 18 inches of clearance above the tank. Quartz or solid-surface materials work best since they can be cut to precise dimensions.
6. Wet Room Concept
Imagine your entire bathroom as one waterproof zone! Wet rooms eliminate the need for shower doors or curtains, instantly opening up the visual space.
With proper waterproofing and a slightly sloped floor directing water to a central drain, the entire room becomes your shower. This European-inspired approach works wonders in bathrooms as narrow as 5 feet wide. The seamless look creates a luxury spa feeling even in the smallest spaces.
7. Linear Layout Strategy
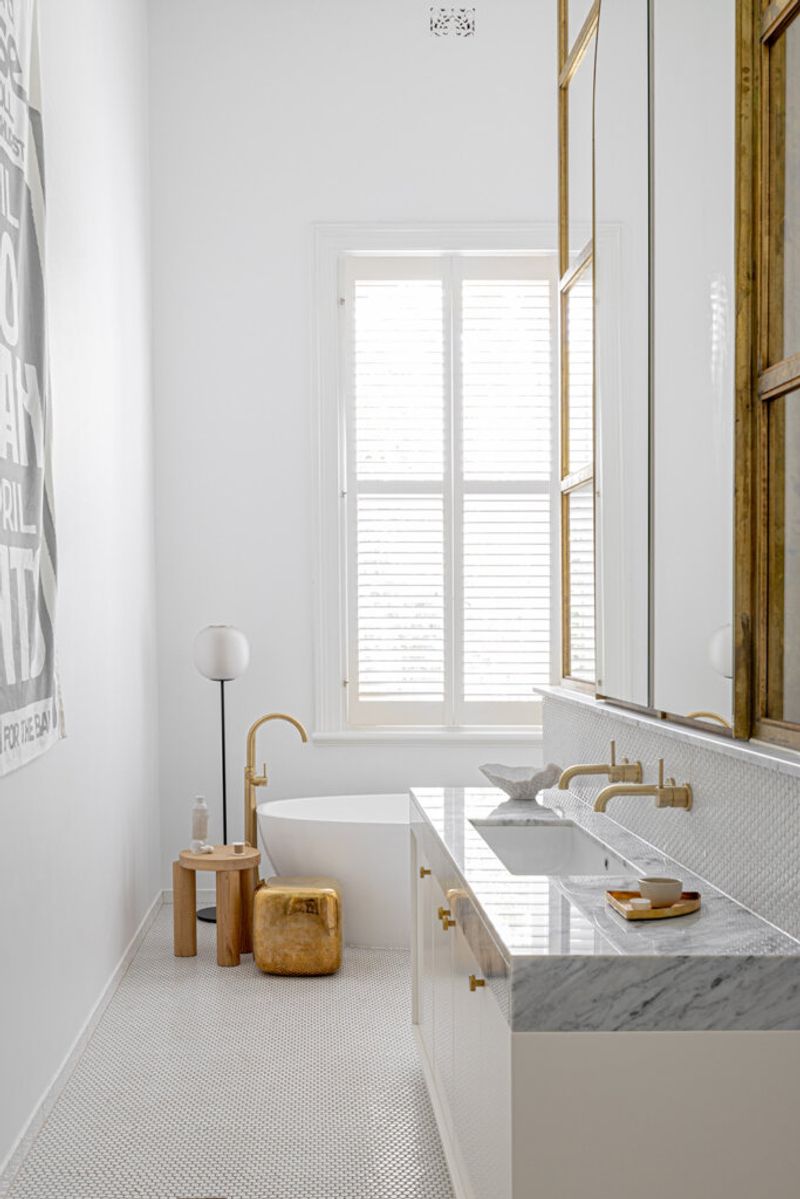
Sometimes embracing the narrowness creates the most efficient design. Arranging fixtures in a straight line along one wall creates a clean, uncluttered flow.
Start with the toilet at one end, followed by a sink, then the shower or tub. This arrangement minimizes plumbing costs while maximizing the perception of space. The opposite wall can feature a full-length mirror or artwork to visually widen the room and reflect natural light.
8. Recessed Storage Niches
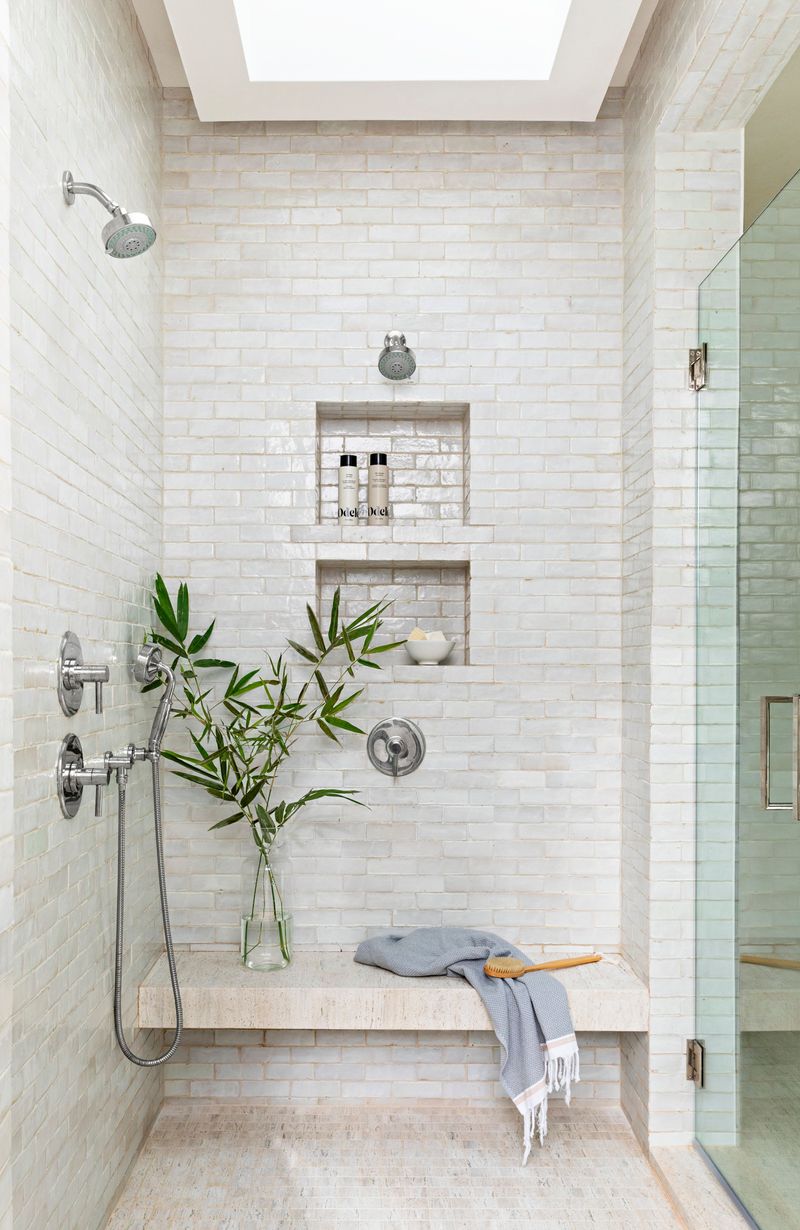
Between wall studs lies hidden storage potential! Carving out 3-4 inch deep recesses creates perfect spots for toiletries, rolled towels, or decorative items without consuming precious floor space. Locate these niches in shower walls, above the toilet, or alongside the vanity.
Adding subtle lighting transforms these practical storage solutions into architectural features. For a cohesive look, finish the niches with the same tile used elsewhere in your bathroom.
9. Sliding Shower Doors

Forget the swing-out shower door that crashes into your toilet or vanity! Sliding doors move parallel to the wall, requiring zero clearance space. Modern options feature nearly invisible hardware and frameless glass that maintains visual openness.
For an ultra-sleek look, consider barn-door style sliders that hang from a minimalist top track. These doors add contemporary flair while solving the practical problem of limited maneuvering space.
10. Vertical Storage Towers
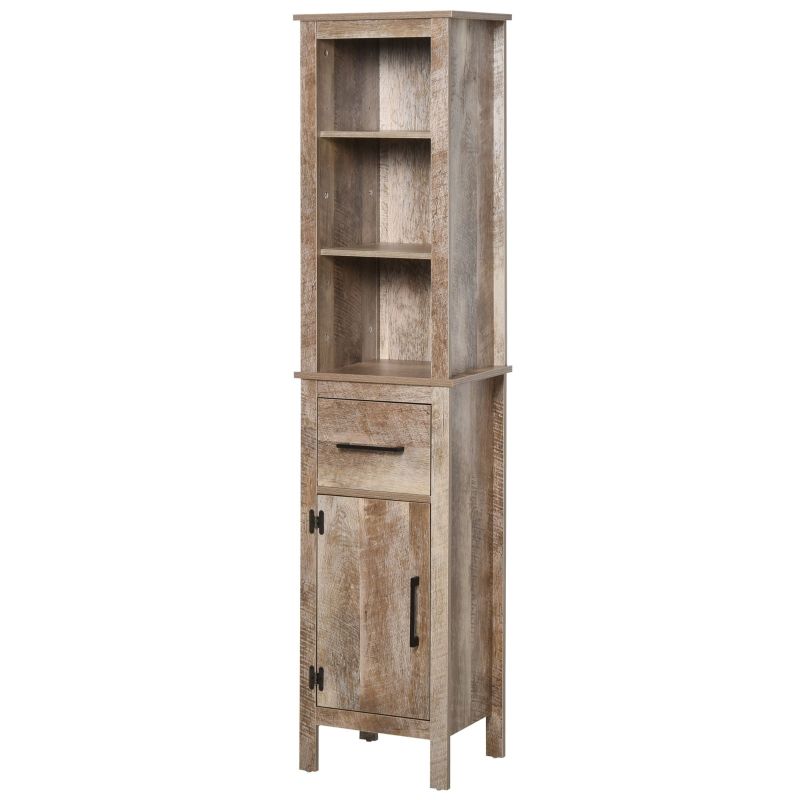
When floor space is limited, look upward! Tall, narrow cabinets utilize vertical space while maintaining a slim footprint. Position these towers in otherwise awkward corners or at the end of a tub.
The ideal width ranges from 12-18 inches – just enough to store necessities without crowding the room. Choose units with a mix of open shelving and closed storage to display decorative items while hiding less attractive essentials.
11. Tub-Shower Combo Against Back Wall
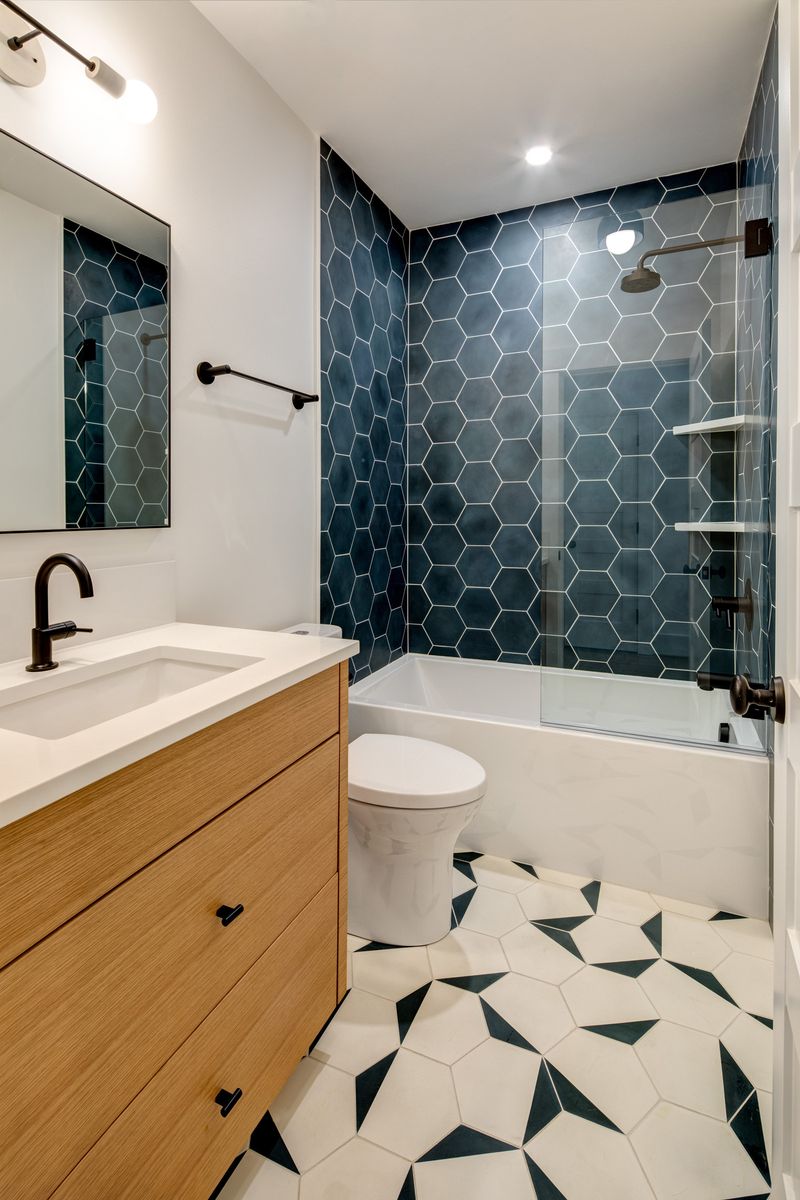
For narrow rectangular bathrooms, placing the tub-shower combination against the far wall creates a natural focal point while keeping the entry area open.
Choose a standard 60-inch tub with shower above, but opt for a sliding glass door or shower curtain that can be pushed aside when not in use. Adding a window above the tub brings natural light deep into the space. For visual interest, create a feature wall with bold tile or wallpaper on this back wall.
12. Continuous Floor Tile Pattern
Visual tricks can make narrow spaces feel wider! Installing floor tiles diagonally or in a continuous pattern without borders creates an uninterrupted flow. Large-format tiles with minimal grout lines further enhance this effect.
For maximum impact, continue the same tile up the shower wall to create a seamless transition. This technique tricks the eye into perceiving more space, especially when using light-colored materials that reflect available light.
13. Vanity With Towel Storage Underneath
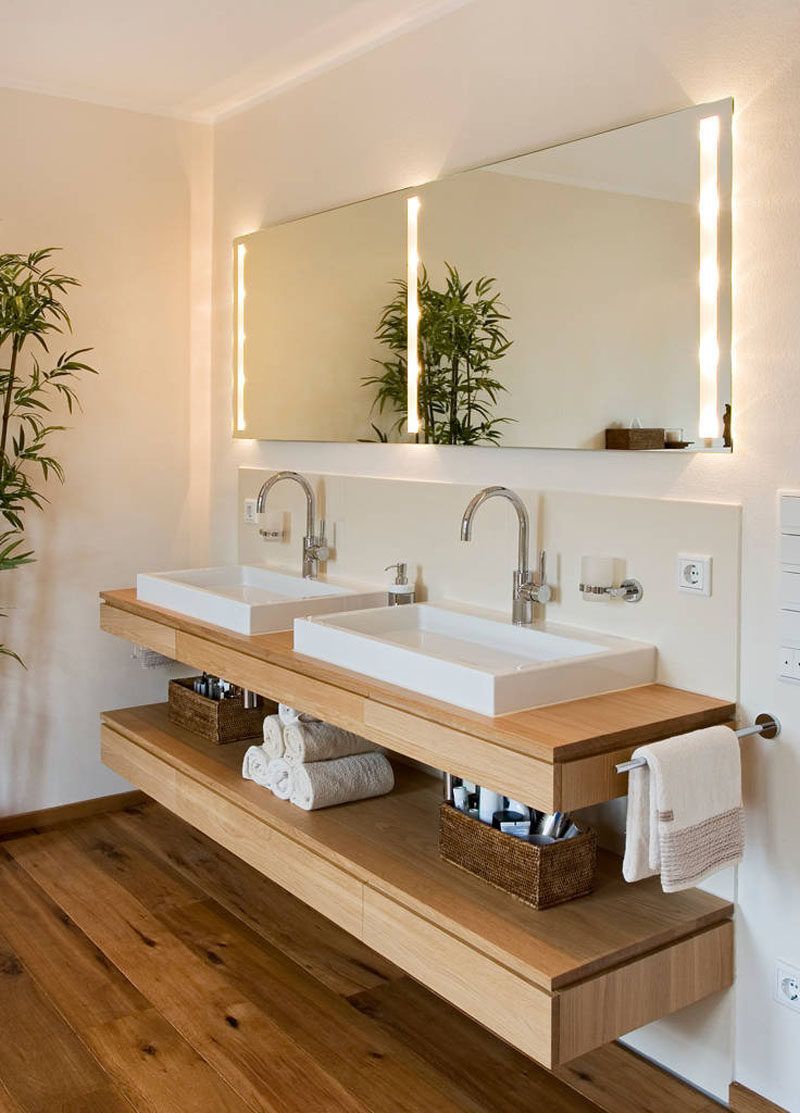
Who says towels need their own cabinet? A vanity with open shelving below provides perfect towel storage while maintaining visual openness. Roll fluffy towels instead of folding them to create an attractive display that’s also functional.
The space beneath a wall-mounted sink often goes unused, but a simple shelf or basket transforms it into prime storage real estate. This approach eliminates the need for a separate linen cabinet in tight quarters.
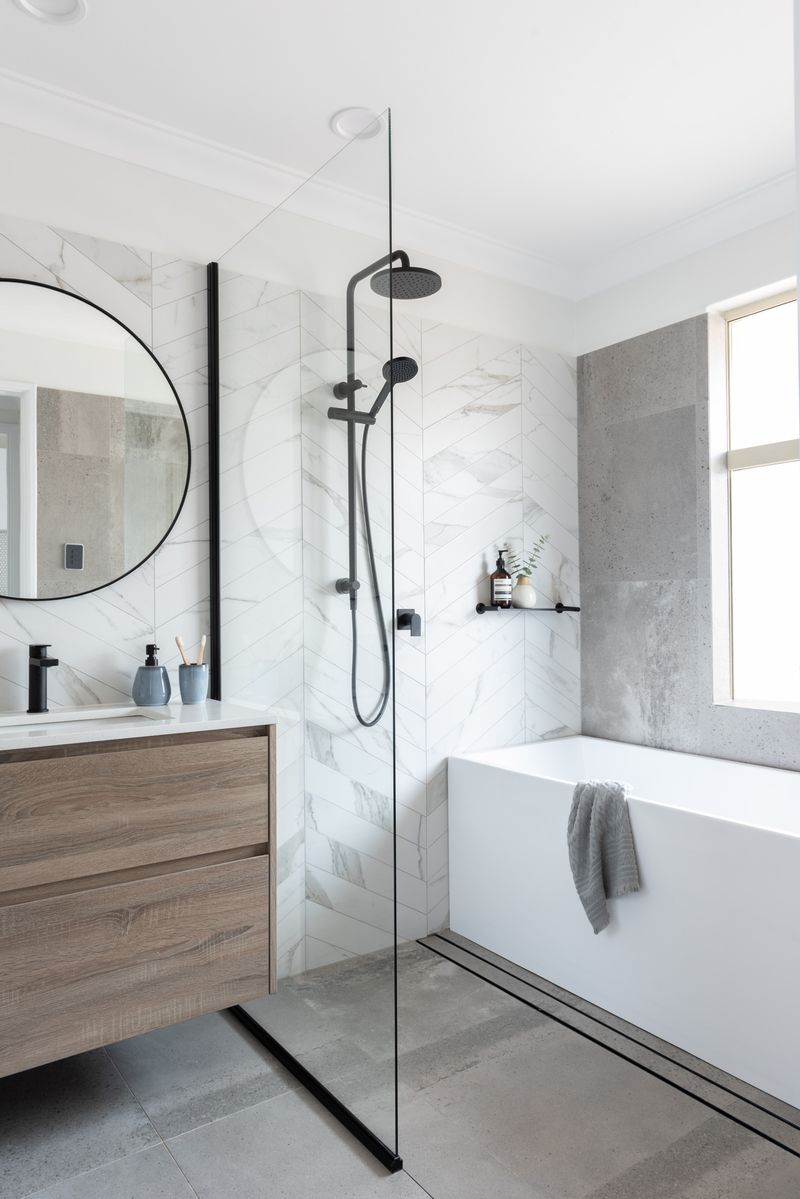
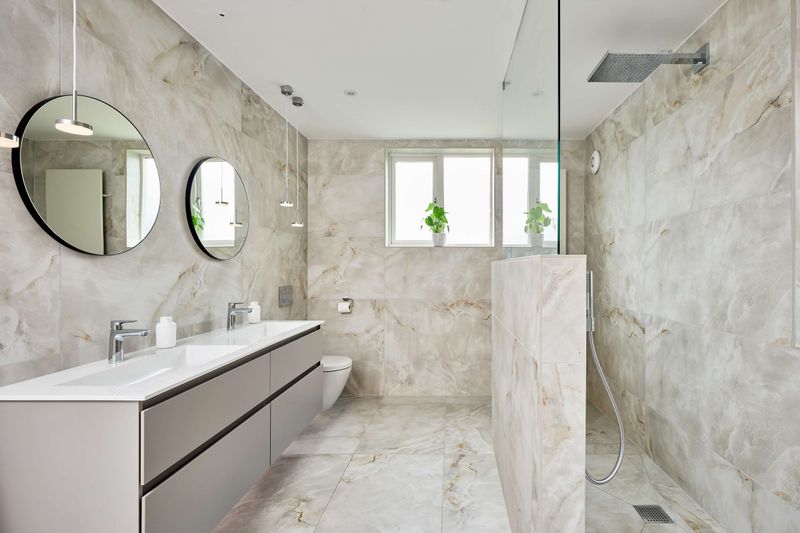
14. Curbless Shower With Linear Drain
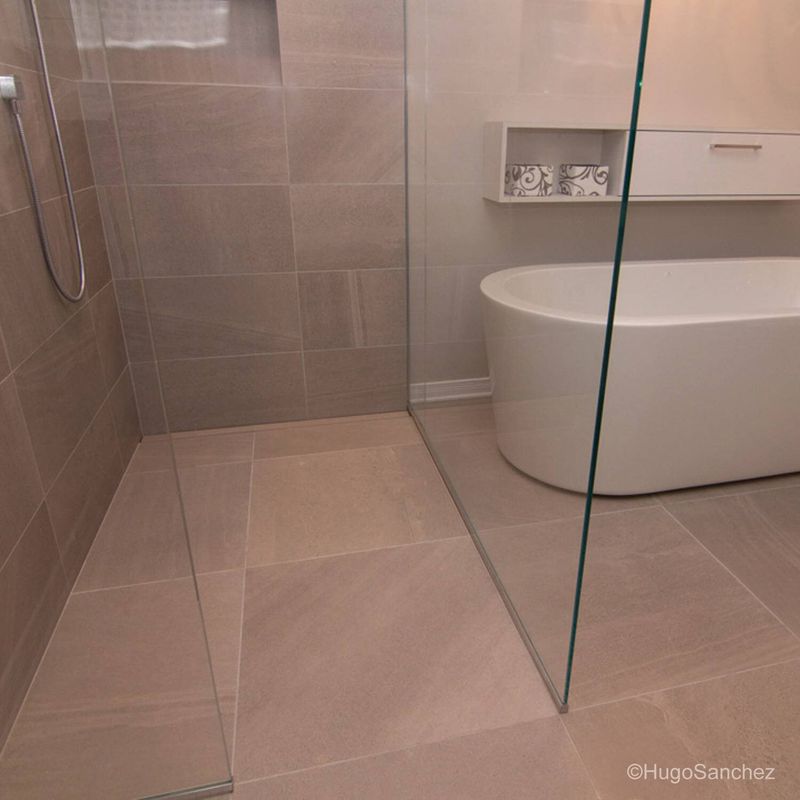
Removing visual barriers makes small spaces feel larger! A curbless shower creates a continuous floor plane from door to back wall. The secret is a linear drain positioned along the shower wall rather than in the center.
This allows for a gentle, almost imperceptible slope toward the drain while maintaining a seamless look. When paired with a fixed glass panel instead of a door, the result is a modern, spacious feel even in bathrooms just 5 feet wide.
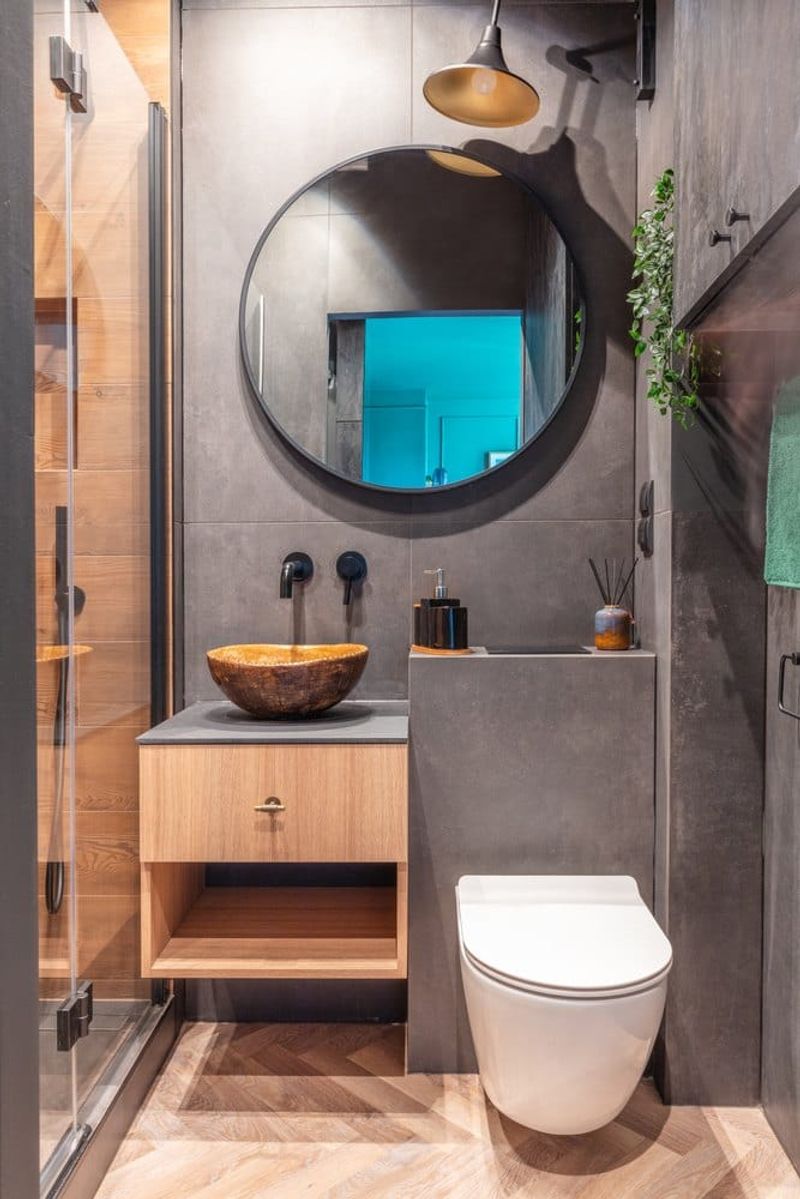
15. Mirrored Wall Expansion
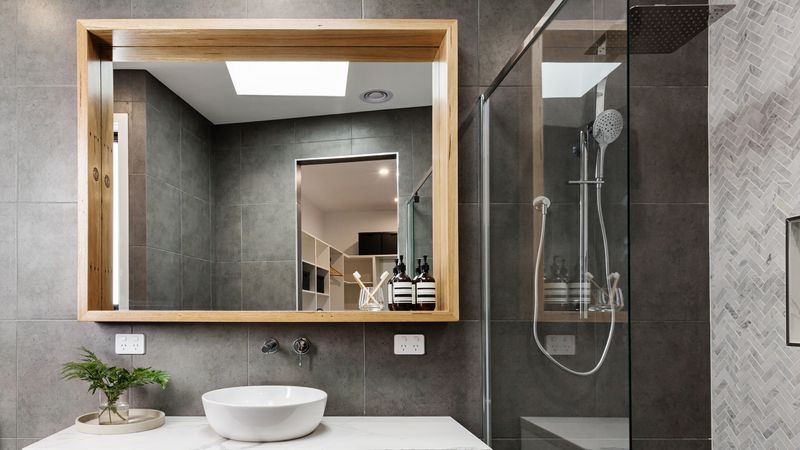
Mirrors create magical space-doubling illusions! Covering an entire wall with mirror visually doubles your bathroom’s width. For maximum impact, position the mirror opposite a window to bounce natural light throughout the space.
Beyond the standard above-sink placement, consider mirroring the wall behind the toilet or beside the shower. Frameless designs create a sleeker, more expansive feel than traditional framed mirrors.
16. Shower Niche Instead Of Bench
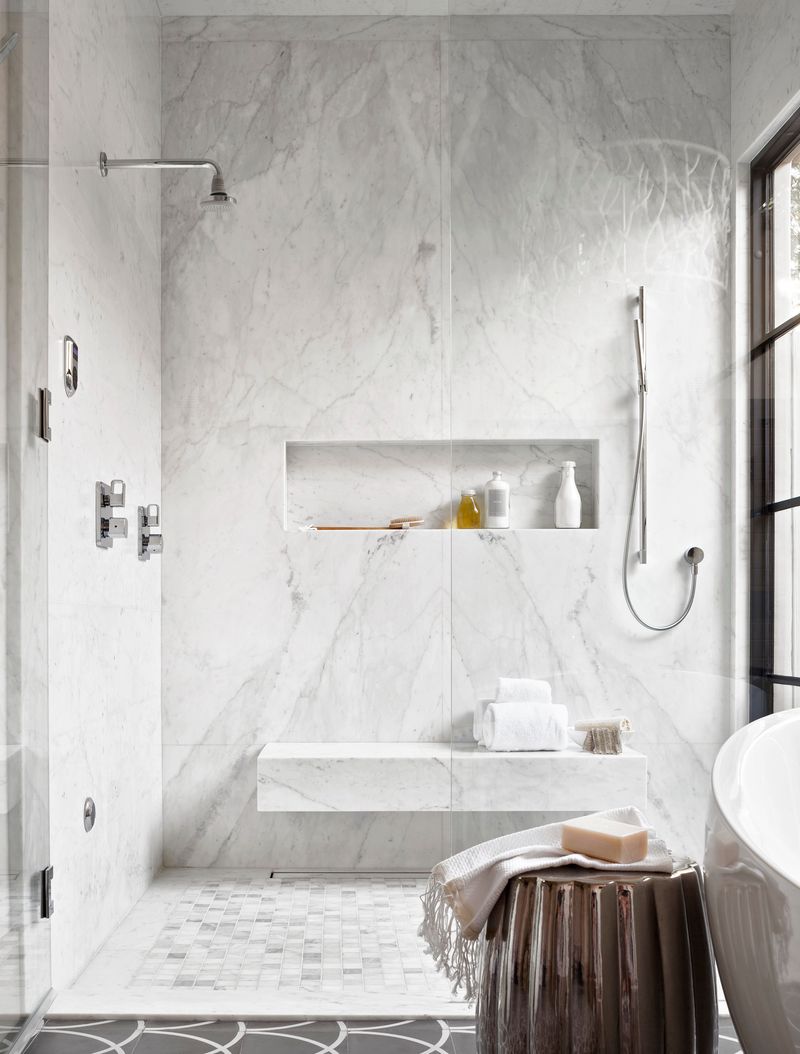
Forget the shower bench that eats up valuable floor space! Recessed niches provide convenient shaving platforms without narrowing the shower footprint.
Create a slightly deeper and wider niche at about 36 inches from the floor – perfect height for propping up a foot while shaving. Above it, add standard-depth niches for shampoo and soap. This clever alternative provides functionality without sacrificing precious inches in your shower’s interior dimensions.
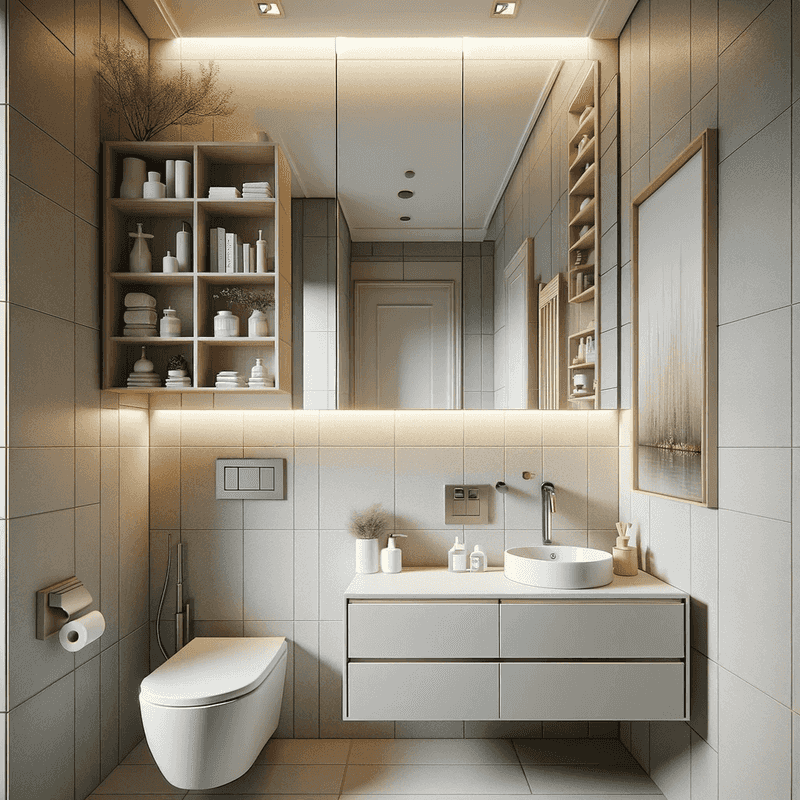
17. Toilet Tank In Wall System
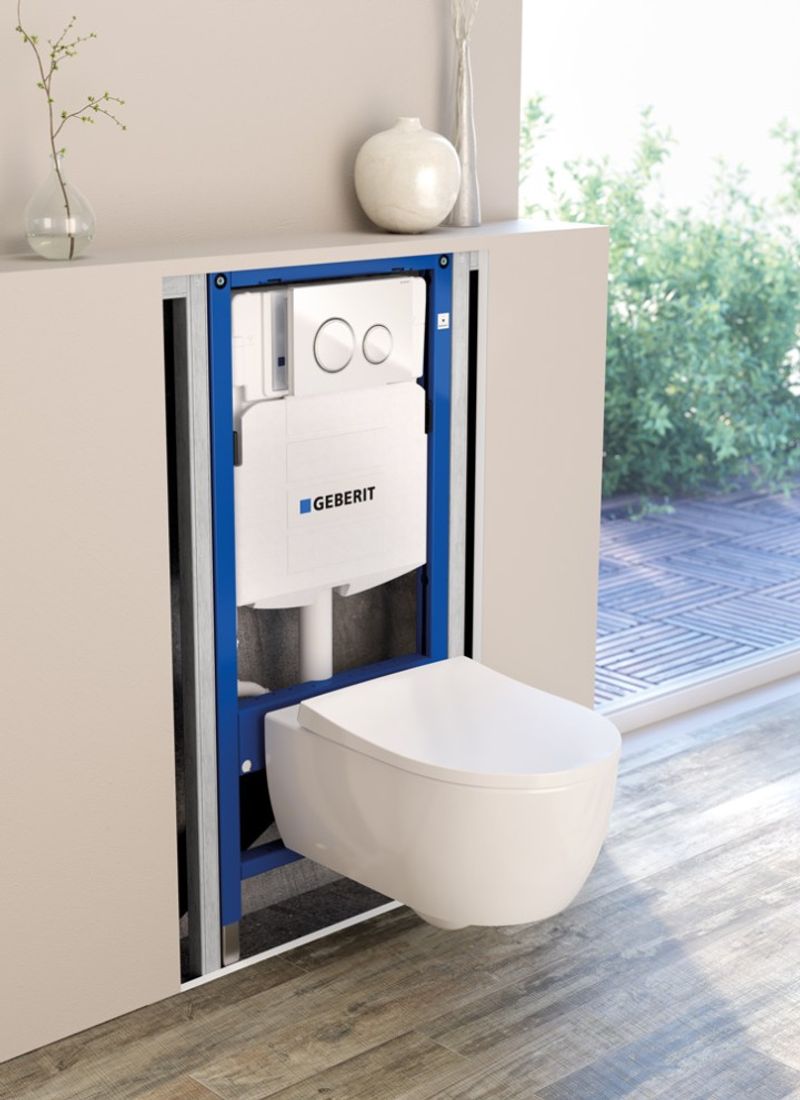
Modern plumbing innovations can reclaim up to 9 inches of floor space! Wall-hung toilets with concealed tanks hide the bulky reservoir inside the wall itself.
Beyond the space-saving benefits, these systems create a sleek, contemporary aesthetic. The wall-mounting height can be customized during installation for perfect comfort based on the primary users’ heights.
18. Barn Door Room Divider
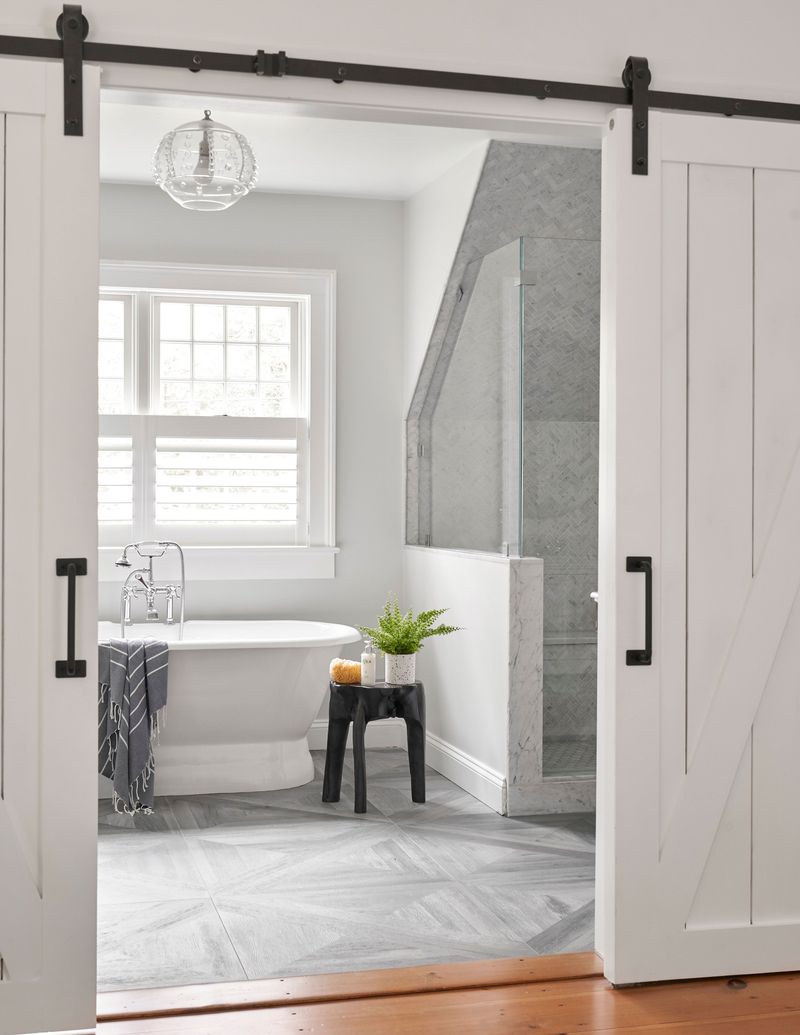
For en-suite bathrooms, a sliding barn door serves double duty! It provides privacy when needed while allowing the bathroom and bedroom to function as one larger space when open.
Unlike pocket doors, barn door hardware mounts to the wall’s surface, requiring no construction inside the wall. Choose a door with frosted glass panels to maintain privacy while allowing light to filter through. When fully open, the door becomes a decorative wall element rather than disappearing entirely.
19. Slimline Radiator Towel Warmer
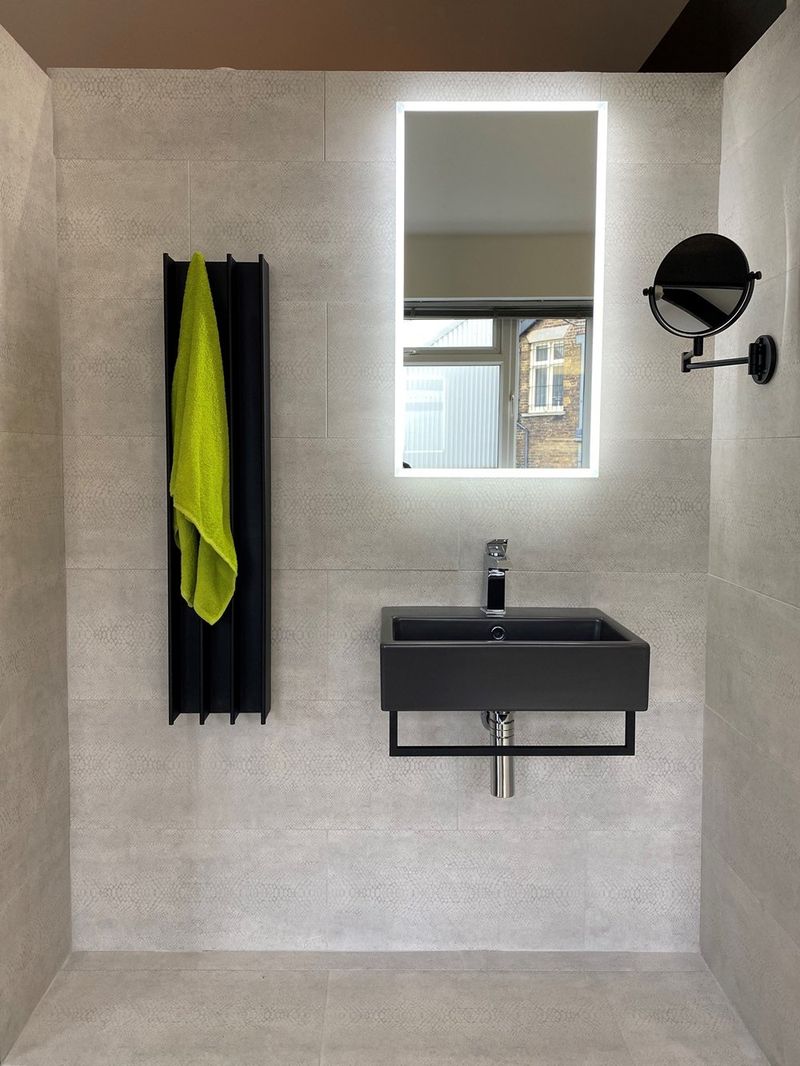
Combining heating and towel storage saves valuable wall space! Vertical panel radiators with towel warming capabilities require just 4-5 inches of depth. Mount these sleek units in otherwise unusable narrow spaces between fixtures.
Beyond providing cozy warm towels, they efficiently heat your bathroom without bulky baseboards that collect dust. The vertical orientation draws the eye upward, creating the perception of higher ceilings while maximizing every available inch.
20. Asymmetrical Layout Balance
Breaking the symmetry can actually create better flow! An asymmetrical layout positions fixtures based on their functional footprint rather than visual balance. For example, place a deeper vanity on one side balanced by a slimmer toilet on the opposite wall.
This approach respects each fixture’s actual space needs rather than forcing equal spacing. The result feels custom-designed rather than cramped, with movement patterns that follow natural use rather than rigid geometry.