18 Easy, Budget-Friendly Tricks To Make Your Retro Décor Look Amazing Again
Do you still have those funky retro pieces that once made your home feel full of personality? I know I do, and I’ve watched some of them fade or wear down over the years.
But don’t even think about tossing those cool vintage finds! With a bit of creativity and just a small budget, you can easily revive your old-school treasures and keep that nostalgic charm alive.
I’ve done it myself, and it’s so satisfying to see these groovy gems looking fabulous again. Here’s how to bring your beloved retro decor back to life without breaking the bank.
1. Vinyl Record Makeovers
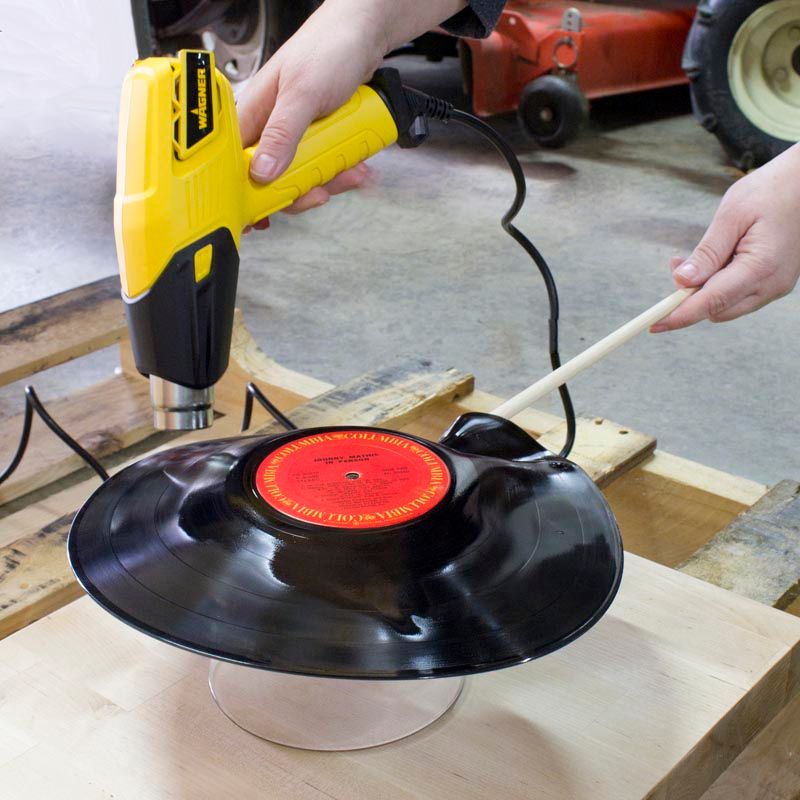
Got scratched records that won’t play anymore? Transform them into wall art by heating them in the oven at low temperature (about 200°F) until pliable, then shape them into bowls or quirky wall decorations.
Once cooled, spray paint them in bold colors that match your room’s palette. Gold or metallic hues work wonders for that disco-era feel without the tacky factor.
Mount them in clusters for an eye-catching music corner that screams “I was cool before streaming was a thing!”
2. Lampshade Facelift
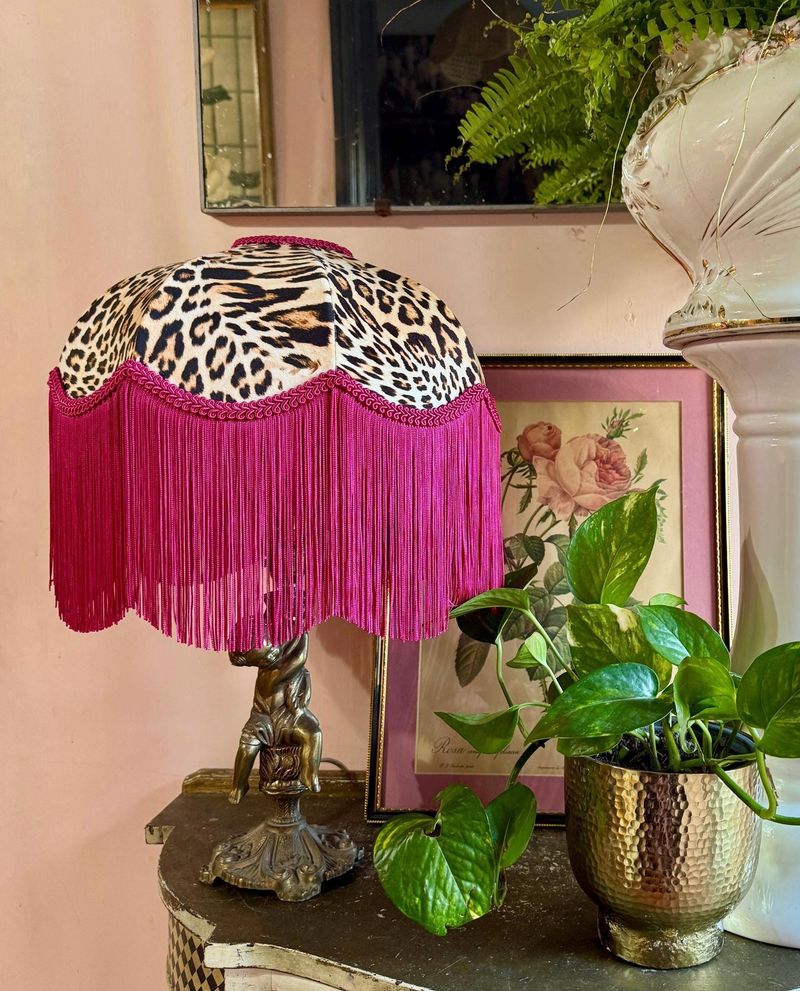
That dusty, yellowed lampshade isn’t ready for the garbage yet! Grab some fabric remnants from the clearance bin and wrap the shade for an instant refresh that costs pennies.
For a funky 70s vibe, try using vintage scarves from thrift stores or even colorful bandanas. Secure with fabric glue rather than hot glue to prevent unsightly lumps and bumps.
No sewing skills? No problem! Fabric tape works just as well for this five-minute transformation that’ll brighten any room.
3. Coffee Table Paper Magic
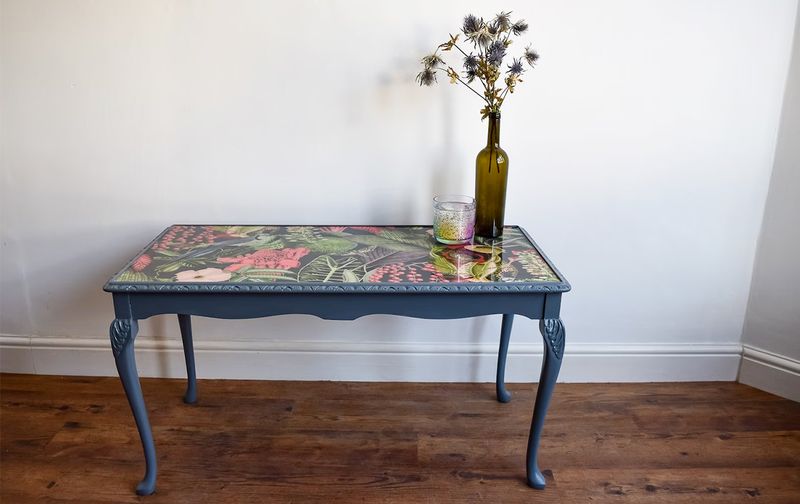
That water-ringed wooden coffee table from the 60s needs love, not replacement! Collect old magazine cutouts, maps, or album covers and arrange them in a collage across the tabletop.
Seal your creation with several coats of water-based polyurethane for a glass-like finish that protects your artwork. The beauty of this project? Imperfections in the original wood actually add character to the final product!
Your guests will never guess this conversation piece cost you nothing but time and creativity.
4. Macramé Miracle Workers
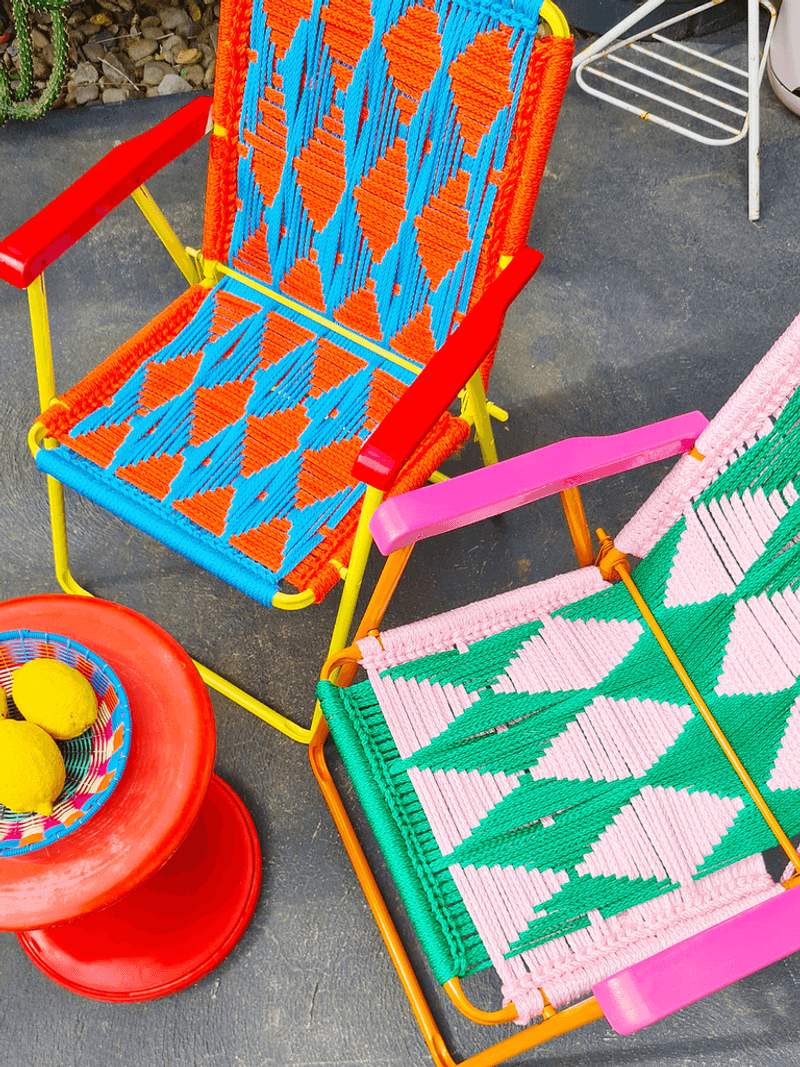
Macramé is back, baby! That old wooden chair with the broken cane seat? Perfect candidate for a macramé makeover using simple cotton rope from the hardware store.
Learn basic knots online and weave a new seat that’s actually stronger than the original. The chunky texture adds visual interest while hiding all those worn spots and breaks.
Bonus hack: Dip-dye sections of your rope in fabric dye before knotting for an ombré effect that screams “I’m crafty and I know it!”
5. Contact Paper Countertop Wizardry
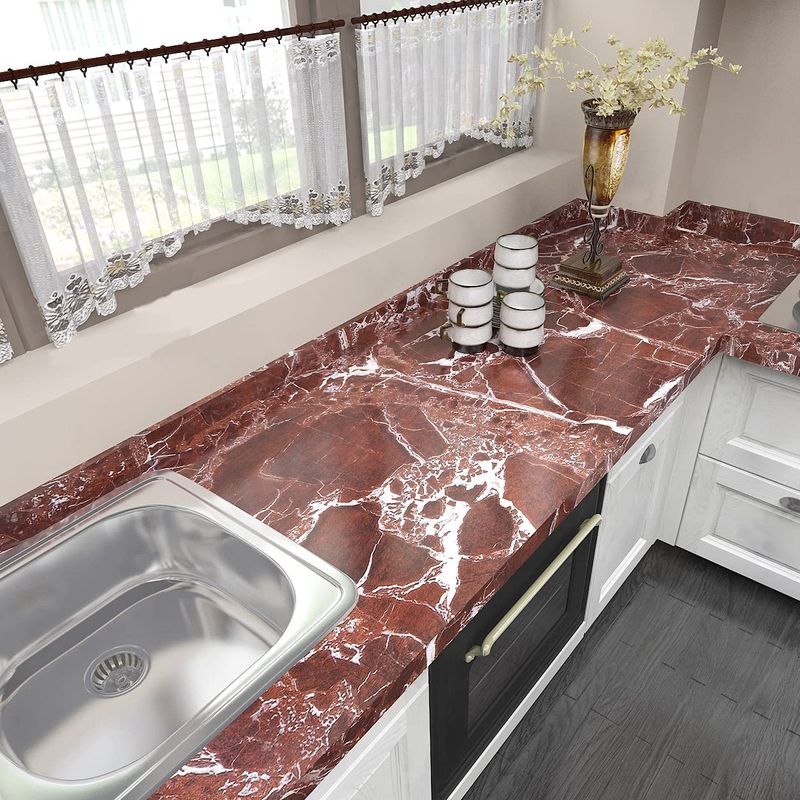
Those laminate countertops from the Brady Bunch era need not haunt you anymore! Modern contact paper comes in amazing finishes like marble, terrazzo, and wood grain that look surprisingly legit.
For under $20, you can completely transform countertops that would cost hundreds to replace. The trick? Work slowly, use a credit card to smooth bubbles, and trim edges with an X-acto knife for pro results.
Seal the edges with clear caulk where water might seep in, and nobody will know your counters aren’t the real deal!
6. Spray Paint Resurrection
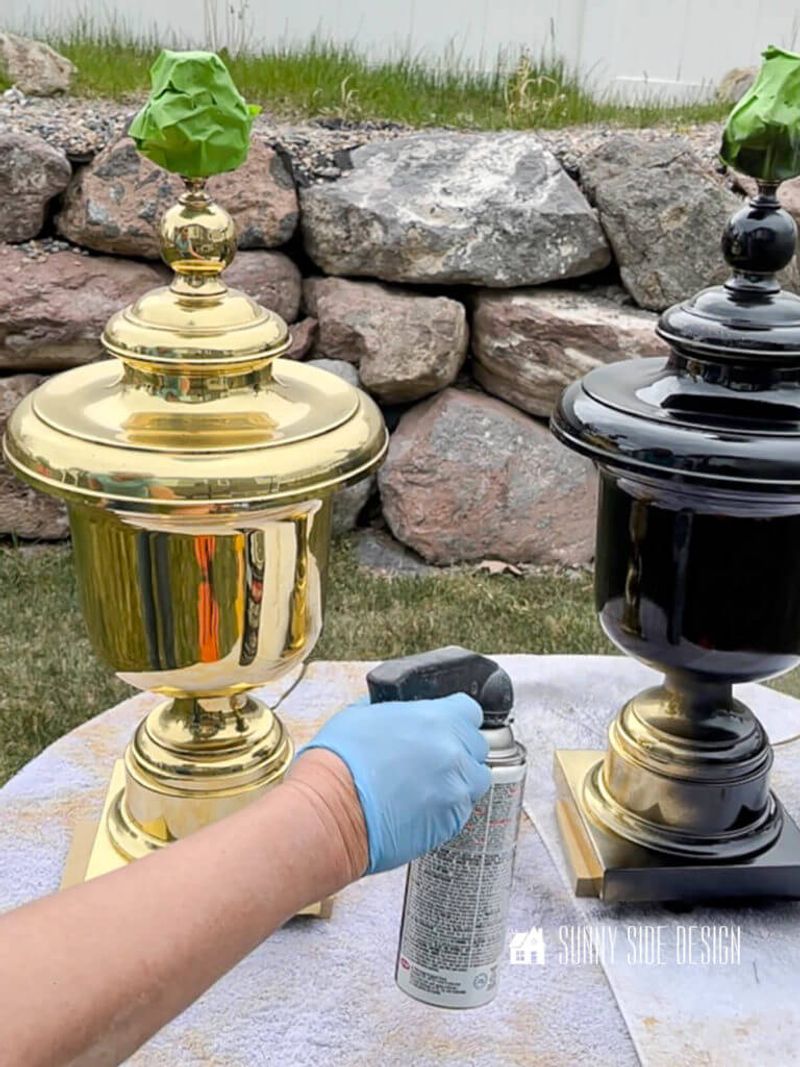
Never underestimate the power of spray paint! Those brass lamps and metal accessories from the 80s just need a color update to feel fresh again. Matte black makes everything look expensive and modern.
The secret to success? Proper prep! Clean items thoroughly with degreaser, sand lightly, and use a primer made for metal surfaces before your color coat goes on.
Try color-blocking by taping off sections for a two-tone effect that turns dated pieces into something that looks straight out of a fancy catalog.
7. Wooden Crate Shelving System
Forget buying new bookshelves! Hunt down wooden crates from flea markets or produce stands and transform them into modular storage that oozes retro charm.
Sand rough edges, then stain or paint in colors that complement your space. The beauty lies in the arrangement—stack them vertically, horizontally, or in an asymmetrical pattern for maximum visual impact.
Attach simple furniture feet to the bottom crates for an elevated look that tricks the eye into seeing custom furniture instead of fruit boxes!
8. Fabric Wallpaper Alternative
That avocado green wallpaper making you queasy? Skip expensive removal and cover it with fabric using liquid starch! This temporary solution creates the look of wallpaper without the commitment or cost.
Choose lightweight cotton in patterns that honor the retro vibe while updating the color scheme. The best part? When you move out or change your mind, it peels right off without damaging walls.
For extra credit, frame sections of vintage fabric as wall art to tie the room together—instant designer touch!
9. Milk Paint Magic
That dark, heavy 70s furniture doesn’t need to weigh down your space anymore! Milk paint gives wood pieces a beautiful, authentic aged look that screams vintage charm without the heaviness.
Unlike chalk paint, milk paint can be translucent, allowing wood grain to peek through for depth. Mix it yourself from powder for major savings compared to pre-mixed specialty paints.
The chippy, imperfect finish is actually desirable here—finally, a paint job where mistakes make it look better!
10. Reupholstery Without Sewing
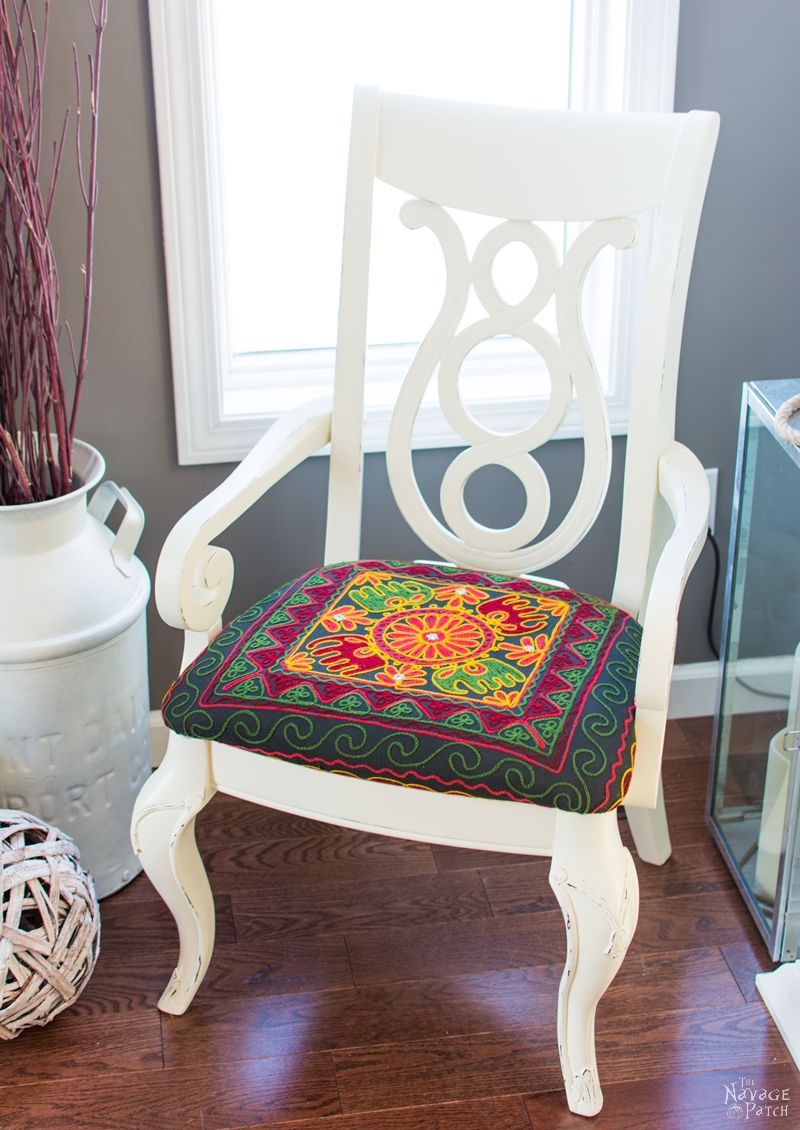
Found a groovy chair with hideous fabric? No sewing machine needed! Staple gun upholstery is your new best friend for quick fixes that look professional.
Choose heavyweight fabrics like canvas or upholstery-grade cotton in fun patterns. The secret weapon? Piping cord and fabric glue create finished edges without a single stitch.
Take photos before disassembly so you remember how everything fits back together—your future self will thank you when reassembly time comes!
11. Drawer Pull Swap Party
Hardware stores charge a fortune for fancy drawer pulls, but thrift stores are goldmines for unique replacements! Collect mismatched vintage knobs to create an eclectic look on old dressers and cabinets.
Mix metals intentionally—copper, brass, and chrome together look deliberate and artistic, not like you couldn’t make up your mind. Just make sure all pulls are the same size or you’ll be filling and drilling new holes.
For extra funk factor, try using old toy cars, doorknobs, or even silverware handles as unexpected drawer pulls!
12. Groovy Grout Refresh
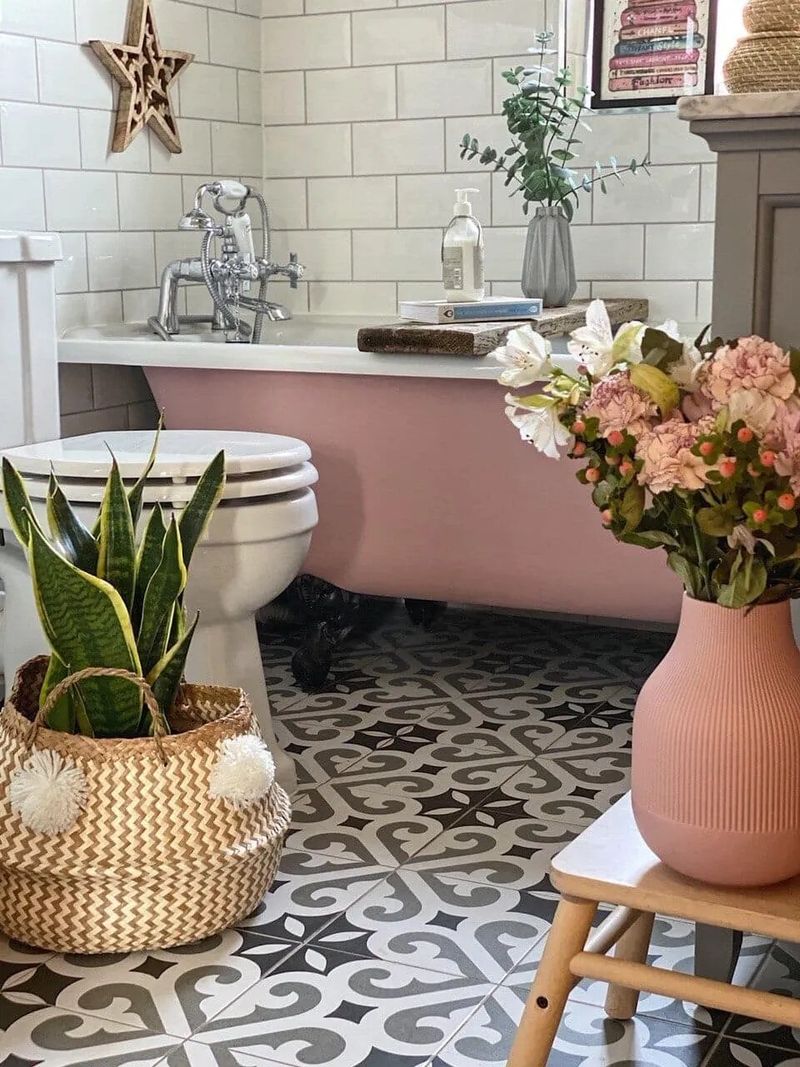
Those pink bathroom tiles from 1955 actually look amazing with the right grout color! Grout pens cost under $10 and can completely transform dated tile by creating contrast or unity.
White grout makes colorful vintage tiles pop while black grout creates a graphic, modern look. Apply in small sections, wiping excess quickly before it dries on the tile surface.
This tiny change makes such a dramatic difference that people will think you installed brand new tile—only you’ll know the truth!
13. Ceiling Tile Tin-spiration
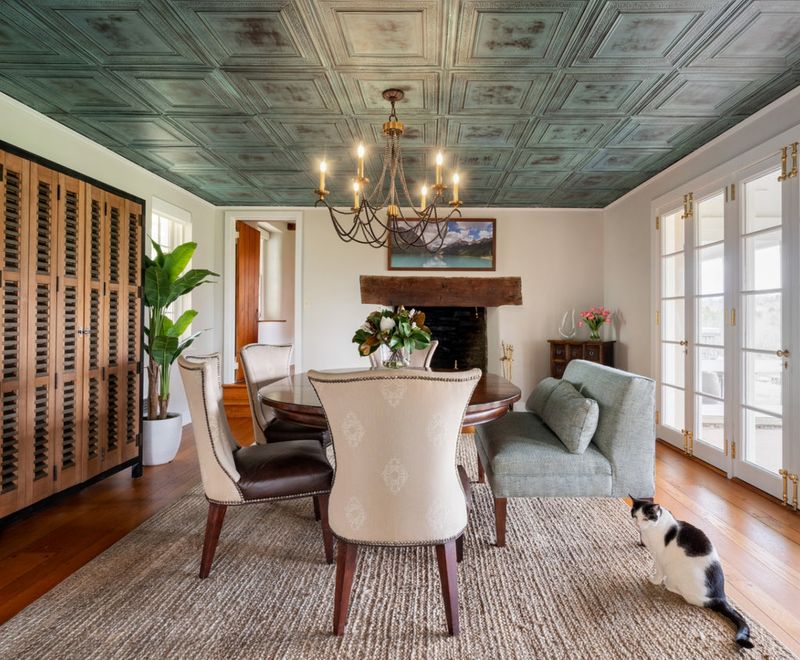
Popcorn ceilings are nobody’s friend! Cover them with faux tin ceiling tiles made from lightweight foam that install with simple adhesive.
Paint them metallic silver for authentic vintage vibes or go bold with copper or gold for dramatic impact. These tiles come in various patterns from Victorian to Art Deco, letting you choose the perfect era for your space.
The best part? Installation requires zero special skills—if you can spread peanut butter on bread, you can handle this project!
14. Washi Tape Window Designs
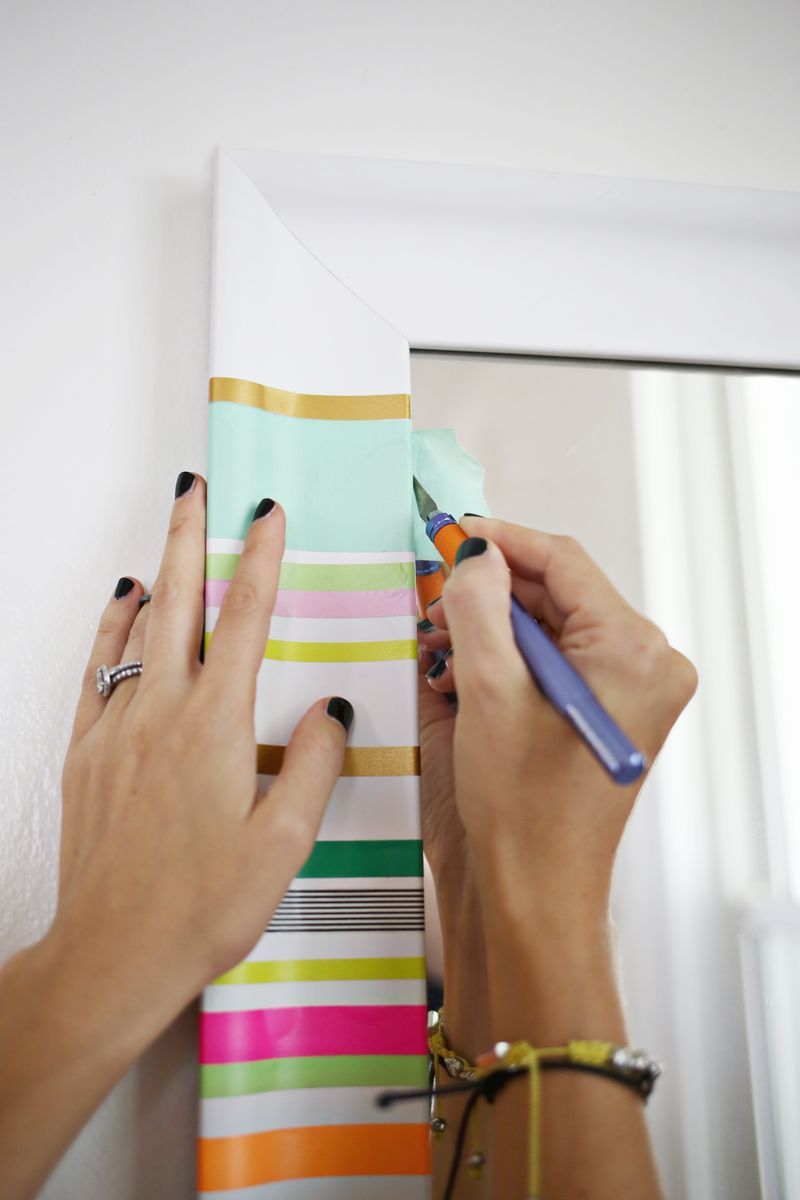
Ugly aluminum window frames from the 70s? Washi tape to the rescue! This removable, colorful tape comes in endless patterns and creates the look of stained glass or custom window frames without permanence.
Create geometric patterns inspired by mid-century design or go full psychedelic with rainbow colors. The low-tack adhesive won’t damage surfaces but stays put until you decide to change it up.
Bonus: it filters light beautifully, casting colored patterns across your floor on sunny days!
15. Shag Rug Revival
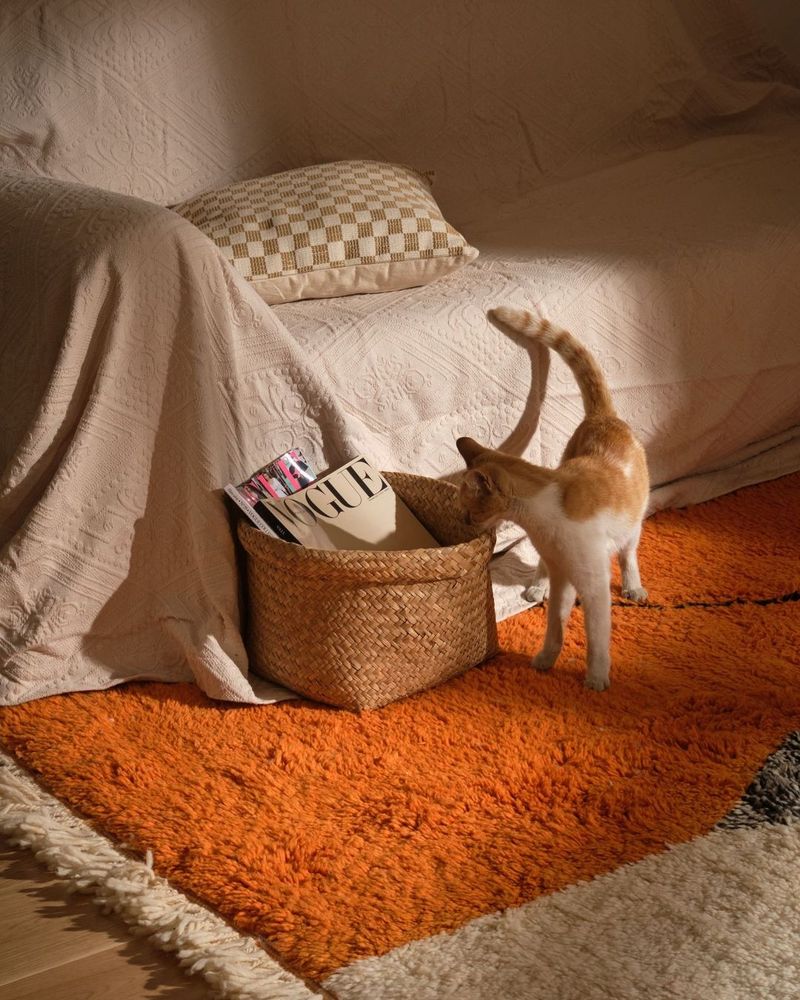
That matted, sad shag rug isn’t beyond saving! Fill a spray bottle with equal parts fabric softener and warm water, spritz generously, then fluff with a stiff brush or clean broom.
For stubborn flat spots, steam from a kettle held 6 inches away helps fibers bounce back to life. Work in sections and be patient—this miracle transformation takes elbow grease but zero dollars.
Finish by vacuuming with the brush attachment on high to restore that cloud-like texture your toes remember!
16. Planter Box Bench Conversion

That ugly built-in planter box from the 60s? Convert it to seating with a simple wooden top and cushions! Cut plywood to size, sand edges smooth, and finish with outdoor-grade polyurethane.
Add foam padding wrapped in weather-resistant fabric for comfort. The hollow planter space becomes hidden storage for gardening tools or outdoor accessories—functionality meets style!
For extra retro points, choose cushion fabric with bold geometric patterns or tropical prints that nod to the original era.
17. Door Knob Coat Rack Genius
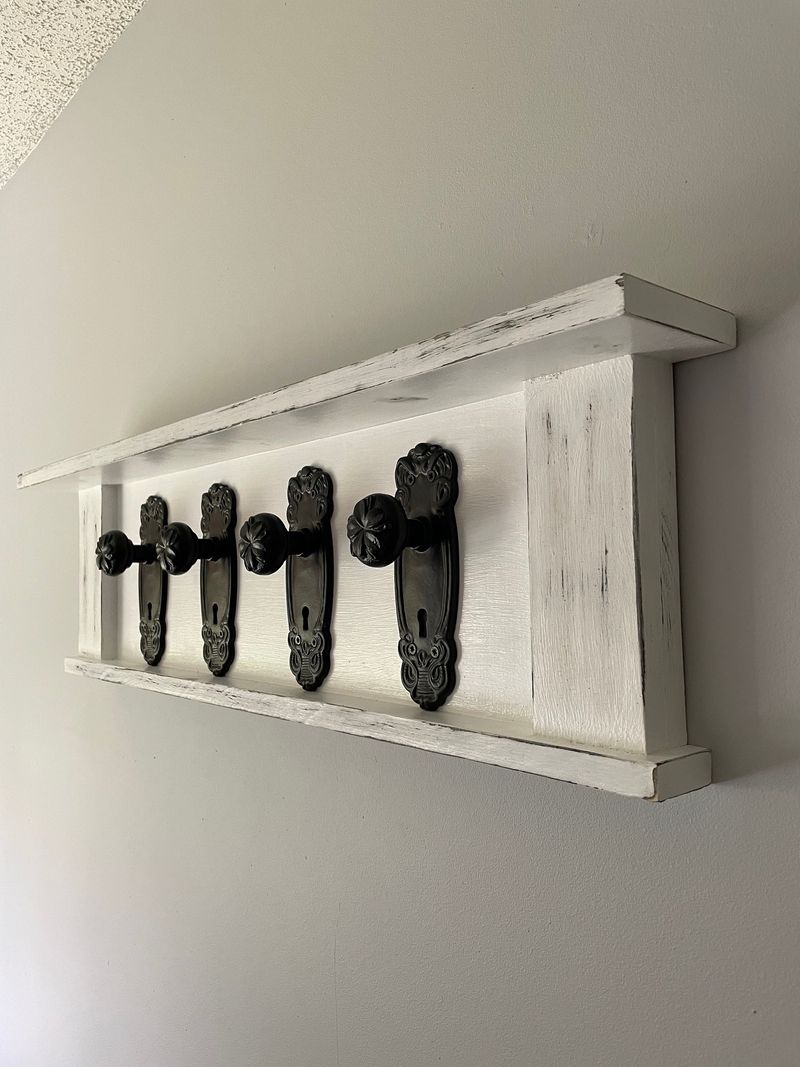
Vintage door knobs make the coolest coat racks ever! Collect mismatched glass, porcelain, or metal knobs from salvage yards or online marketplaces.
Mount them on a painted board with simple screws, spacing them evenly for a balanced look. The different heights, colors, and styles create visual interest while the function remains straightforward.
Hang this by your entryway for instant character that tells visitors “Yes, I absolutely meant to do that with those doorknobs!”
18. Suitcase Side Table Surprise
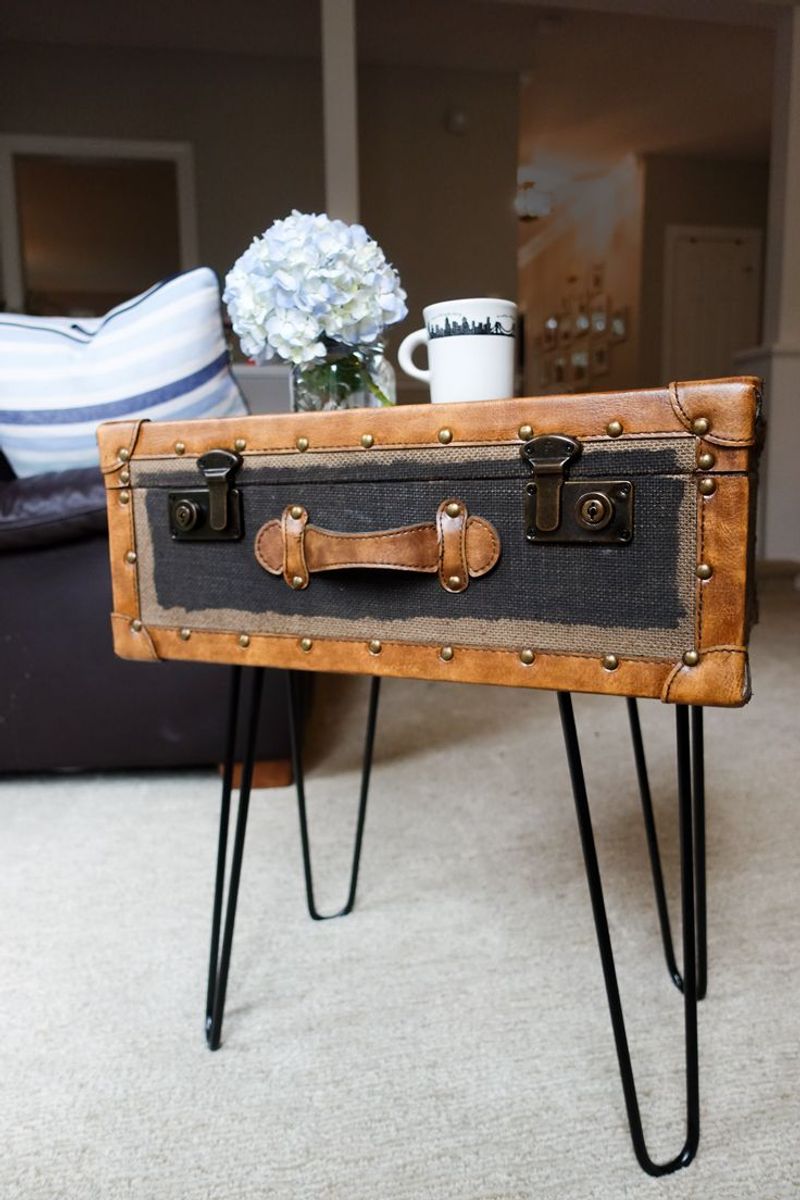
Vintage suitcases stack beautifully to create unique side tables with built-in storage! Look for hard-sided cases with interesting textures or colors at thrift stores.
Add hairpin legs to the bottom suitcase for height, or stack them on a simple wooden base. Leave them closed for a clean look or permanently attach the lids open for display shelving inside.
The worn edges and travel stickers become charming details rather than flaws in this conversation-starting piece!